Tutorial Preview
Highlights
Struggling for time? You’ve come to the right place. We have carefully selected all the key parts of the tutorial that you can view in no time at all to enable you to make this adorable cake!
1. Making the Flowers
Struggling for time? Why not watch a condensed version of the entire tutorial by scrolling down to “Highlights”
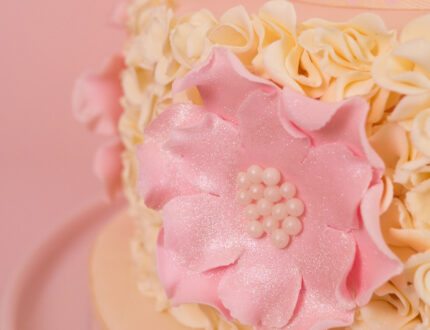
To get the same colour of flower paste as Paul, simply use a 50/50 ratio of pink and white which gives a nice pale pink. When you are rolling it out try and get it to about 1mm thickness or if you have a pasta roller to hand, perhaps use that to make things easier. All you need to do now is cut out three flowers with your cutters and go over the edges with a ball tool to add frills to the petals. Put the three flowers on top of each other with some edible glue and add some pearls to the centre.
2. Making the Ruffles
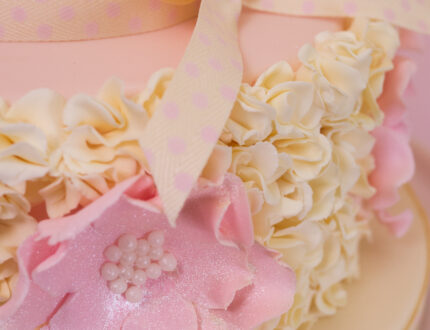
A lot of the techniques used in the last lesson are used for this section. Again, you will be rolling out white flower paste to around 1mm in thickness and cutting out daisy shapes with the smaller cutter. Once you have created frills on the petals you fold it in on itself, cut off the excess and then stick these onto the cake. It doesn’t take long to make one…but considering you will be making approx 700 you may want some help!
3. Attaching the Ruffles
In this lesson, Paul shows us how to get a little production line going to speed up the process of making the ruffles. He also shows us how to fold them and attach them securely. Paul recommends getting the pasta roller down to 7 if you can manage it…yes, that’s how thin you want it!
4. Attaching the Flowers
To finish the flower off, Paul dusts with snowflake dust. This gives them a bit more depth as they can look a little flat. When it comes to attaching them, you might find that they can’t fit in securely now that the ruffles are in place. Don’t worry, as if you have left them overnight they will be quite brittle and you can easily break away bits to allow the flowers to fit. You can also do what Paul does and put a ball of sugar paste brushed with glue in the centre of the gaps for the flower to stick to.
5. Making the Ballerina Pt 1
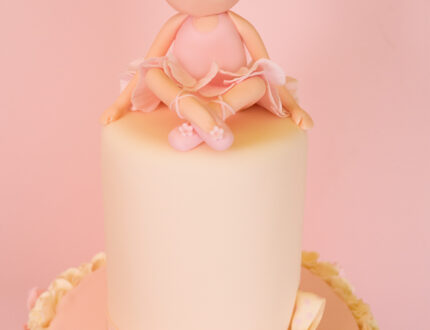
When making the body, Paul uses 50/50 of pink flower paste and white sugarpaste to soften it a little. The shape of the body should be a slightly elongated egg shape. For the legs, simply roll out a long fairly thick sausage of flesh colour sugarpaste and then little pink sausages for the shoes. Once you attach the shoes to either end of the sausage simply cut it in half and you have two legs. Depending on how you have the legs positioned you may want to make them differently. Paul has decided to have the ballerina sitting with her legs crossed but if you want her to be striking a pose then you will want to use some kind of internal structure.
6. Making the Tutu
In this lesson, Paul shows us how to make a frilly little tutu for the ballerina. Paul uses a certain cutter which is linked in the tools section below. Simply cut out a shape from pink flower paste (rolled out using setting 5 on a pasta roller) and then cut out the centre with a circle cutter, frill the edges, cut it in half and place it around the body in two halves. Of course you can add a little bling to them with some dust.
7. Making the Ballerina Pt 2
The arms are very simple to do. Roll out in to sausages and with your pinky taper the ends to create a wrist shape. Then flatten that part of the sausage slightly and cut out a thumb. Round off the hands a little with your fingers so that they have a nice smooth look. Make sure both the arms are equal in length and attach them to the body with edible glue.
8. Adding the Eyes
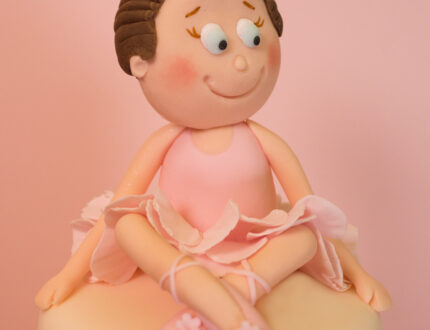
At first, Paul uses edible paint from Squires Kitchen but finds that it’s a bit too oily and doesn’t create a solid enough colour. To get a better result, Paul then uses petal dust mixed with alcohol which creates a much thicker paint. Once the eyes have dried, just make two little balls of blue and black sugarpaste and add them on top of each other to finish them off.
9. Finishing Touches
Just a few little details and then we’re all done! Once you have painted the eyelashes and eyebrows on and added the ballerina’s rosy cheeks, it’s just a case of adding the hair. You will learn a very fast and effective way of creating a cute bun hairstyle. Once you have done this you can add some little flowers as Paul has and by adding a little dust to the sugarpaste you give the flowers that little more detail that really makes them stand out.
10. Other Ideas
In this lesson, Paul shares some ideas that you can implement into your version of this cake to make it unique to you. We would love to see your ballerina cakes so please share them with us on our Facebook Page.
11. Pro Lesson
Paul discusses the cost of making the Little Ballerina Cake as well as what he would charge for the cake – useful tips for every professional cake designer.
Paul introduces us to his beautiful ballerina cake. This is ideal for a little girl’s birthday or for anyone who loves ballet. This cake can be adapted to suit a number of celebrations and is aimed at intermediate level or for a beginner looking for a challenge. It will take approximately two half days to create, allowing for drying time. We hope you enjoy this tutorial as much as Paul enjoyed making it!


