Tutorial Preview
Highlights
This is the place to be if you are struggling to find that time to watch the entire tutorial. Here we have carefully selected some of the key parts to help get you started.
1. Making the Column
Click here to contact Robert and purchase the mould.
To start us off Robert shows us how to make the column of the orchid and thankfully we will be using a fantastic mould that Robert himself as designed. The column itself will actually do just about all the work for you and really it’s just a case of working the flower paste into all the nooks and crannies. Just remember and use plenty of corn flour as it will be your lifesaver throughout this tutorial. Once you have finished using the mould it’s just a case of fine tuning the shape with a balling tool and a pair of embroidery scissors and then we’re done.
2. Making the Petals
In this lesson we will be making the orchid petal. First of all and most important of all we need to get the flower paste nice and warm and then we will be using some very botanically accurate veiners that Robert has designed and will be available to buy very soon. Robert helps us along by providing a template which you can use to cut around to get a nice orchid petal shape. A handy tip that he shares is to actually purposefully create a lot of scratch marks on your green board to help your sugar flowers stick to it. Something else that might be new to you is using your fingers as a ball tool as demonstrated in this lesson. By the end of this lesson your attention to detail and knowledge of how to create beautiful textures with the most basic tools will have come on leaps and bounds. How exciting!
3. Making the Throat
Ok…Robert’s just showing off now. He’s designed yet another mould which is ridiculously realistic and will mean you cannot fail…unless you don’t use enough corn flour. You will now be familiar with quite a few of the techniques used and so will be fast becoming a pro. It has to be said however that he makes it look too easy. The aim of the game for this lesson is to really pay attention to the mould and make sure your paste is going in all the right places and that the mould is being put together correctly. Now we will let it dry and move onto colouring the column.
4. Colouring the Column
For this lesson you definitely want to have an orchid to hand or at least an image of one in front of you for reference. You want to make sure you study the flower and recreate exactly what you see. Easier said than done I am sure! We will now be dusting so get your brush, paint palette and glaze ready. The recipe and ratios for the glaze are detailed in the ingredients section and it encapsulates as well as adds a beautiful depth to the colours.
5. Colouring the Column pt 2
In this lesson you will meet Richard. Richard is a very fine paint brush that happens to be Robert’s favourite and we recommend that you make sure you have your very own Richard. Believe it or not Robert uses an even finer paint brush later in the lesson. The attention to detail in this lesson is through the roof but well worth it. Again you will definitely want to have that Orchid in front of you, in fact for the rest of this tutorial. You may also want to practise painting delicate lines and dots with a fine brush before going onto the column as once it’s on you won’t will be remove it.
6. Colouring the Throat
Now that the throat has dried we can start colouring it. The exact same colours will be used as used for colouring the column which is handy. Pay attention to angle at which Robert holds the throat and to the natural gradients he creates using only one colour. When it comes to the painting make sure that you trial your colours on a plain bit of paper. You will learn some great techniques including a method that allows the veins to really show through. In this lesson Robert uses his homemade glue which is made up of flower paste and egg white mixed with a fork to allow him to attach the column to the throat.
7. Making the Glaze
In this lesson Robert shows how he makes his special glaze that can be adapted to create different finishes.
8. Steaming and Glazing the Throat
Try and not burn your hand when testing the temperature of the steam! If you don’t have a steamer at home then feel free to use a kettle. Once you have steamed it move straight to glazing it and make sure you get every part of it. When you spin of the excess make sure you don’t spin too vigorously or all your hard work will be come flying off. Now we can go back to the petals.
9. Colouring the Petals
First all we need give the stem that lovely deep red colour but fear not. Not more dusting or painting here…just some floristry tape. Now we can do some more dusting and colouring for the petals themselves. You would think that the petals are the part that people would pay least attention to but in fact they had a huge amount of realism to the flower so definitely follow his every instruction! What is reassuring with this lesson and all of them in general is that nature is not perfect and each flower has it’s own imperfections and unique quality so don’t get too precious about everything being uniform and straight. You will learn that every part of the brush has it’s use and brings out a completely different texture.
10. Attaching the fine hairs
If you didn’t believe me that Robert is an absolute master when comes to attention to detail you will now. This is another one of those details that is in one sense very insignificant but is breathtaking when noticed and will fool even a florist. Trust me..it did. All you will need is a cotton bud, Yellow dust and high content alcohol along with some other previously used tools. Good luck.
11. Putting the the Orchid Together
So now it’s the most satisfying part of all! This is when you really get to appreciate just what you have created as all the parts come together beautifully to form a stunning edible (but would you let anyone eat it) sugar Cymbidium Orchid. This is definitely not something you want to guess at as it is trickier than you might think so don’t rush ahead just yet. Get a cup of tea and assemble it along with Robert.
12. Making Contorted Hazel
If you happen to be making a sugar flower arrangement then this would be a beautiful addition to enhance the overall design. It gives a very modern look and is in fact very simple to make and is entirely up to you what shape it is. It’s great fun!
13. Other Ideas
In this lesson Robert gives us some other ideas for displaying the orchid. I don’t want to say any more and spoil it so watch and find out.
14. Pro Lesson
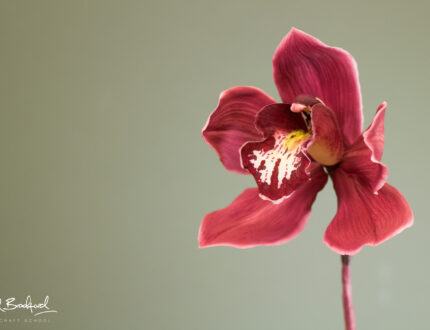
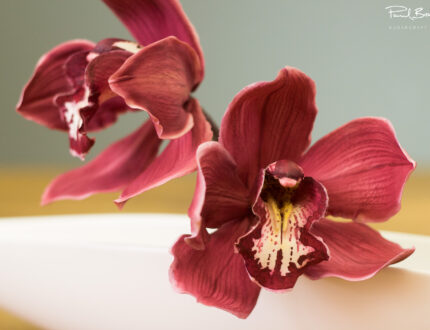
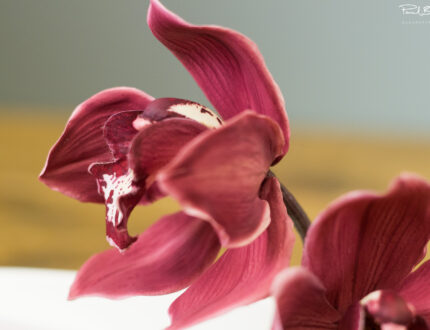
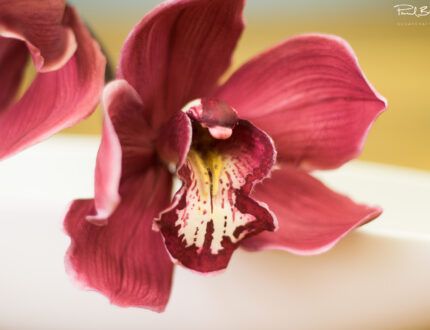
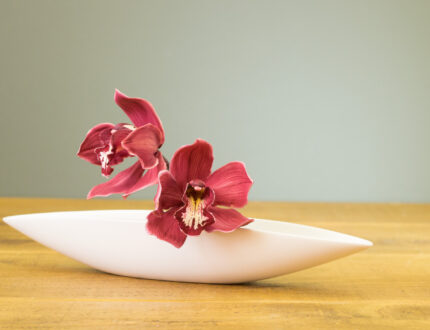
Robert introduces us to his stunningly realistic Cymbidium Orchid sugar flower. Can you believe that it is actually edible? We can’t imagine anyone would dare eat it! The skill level for this tutorial is aimed at intermediate to advanced level cake decorators and will take two to three days to create, allowing for drying time. Imagine adding this to a wedding cake, or even having it on display in the house as a lifelong orchid!
History of the Cymbidium Orchid Sugar Flower
The cymbidium orchid is a genus of flowering plants in the family Orchidaceae. It is native to the tropical and subtropical regions of Asia, Australia, and the Pacific Islands. Cymbidiums are popular ornamental plants, and they are often used in cut flower arrangements.
The history of the cymbidium orchid can be traced back to ancient China, where it was cultivated as early as the 6th century BC. Cymbidiums were also grown in Japan during the Heian period (794-1185 AD).
In the 19th century, cymbidiums were introduced to Europe by British plant collectors. The first cymbidium hybrid was created in 1889, and since then, hundreds of new hybrids have been developed.
Today, cymbidiums are grown all over the world, and they are one of the most popular types of orchids. They are prized for their beautiful flowers, which come in a wide range of colors and shapes.
Some interesting facts about cymbidium orchids:
- The name “cymbidium” comes from the Greek word “kymbos,” which means “boat.” This refers to the shape of the orchid’s lip.
- Cymbidiums are epiphytes, which means that they grow on other plants or objects.
- Cymbidiums can live for up to 100 years.
- The largest cymbidium orchid in the world is over 10 feet tall and has a flower span of over 6 feet.
- Cymbidiums are the national flower of Bhutan.
We would love to see your take on the Cymbidium Orchid – please share your pictures with us on our Facebook Page!
