Tutorial Preview
11 Pipers Cake | Cakeflix – Cake Decorating Tutorials
with Paul Bradford
Skill level:
Easy Cake Decorating | Cakeflix - Beginner Level Courses
HD Lessons:
14
13:00
1. Preparing the Cake and Piper
We start the lesson off by creating the florist wire based armature for the bagpipe playing Scotsman. You may find a pair of plyers comes in handy when bending the wire into place and this can be fixed together using florist tape.
07:56
2. Creating the Numbers
The cake will be topped off with a number 11 which signifies the 11 pipers piping. The same techniques can be used to create any number if, for example, you’re making the cake for a Birthday celebration.
17:20
3. Making the Legs
The model is created from the bottom section up, so the first stage is creating the legs and socks using sugarpaste attached over the wired armature.
11:04
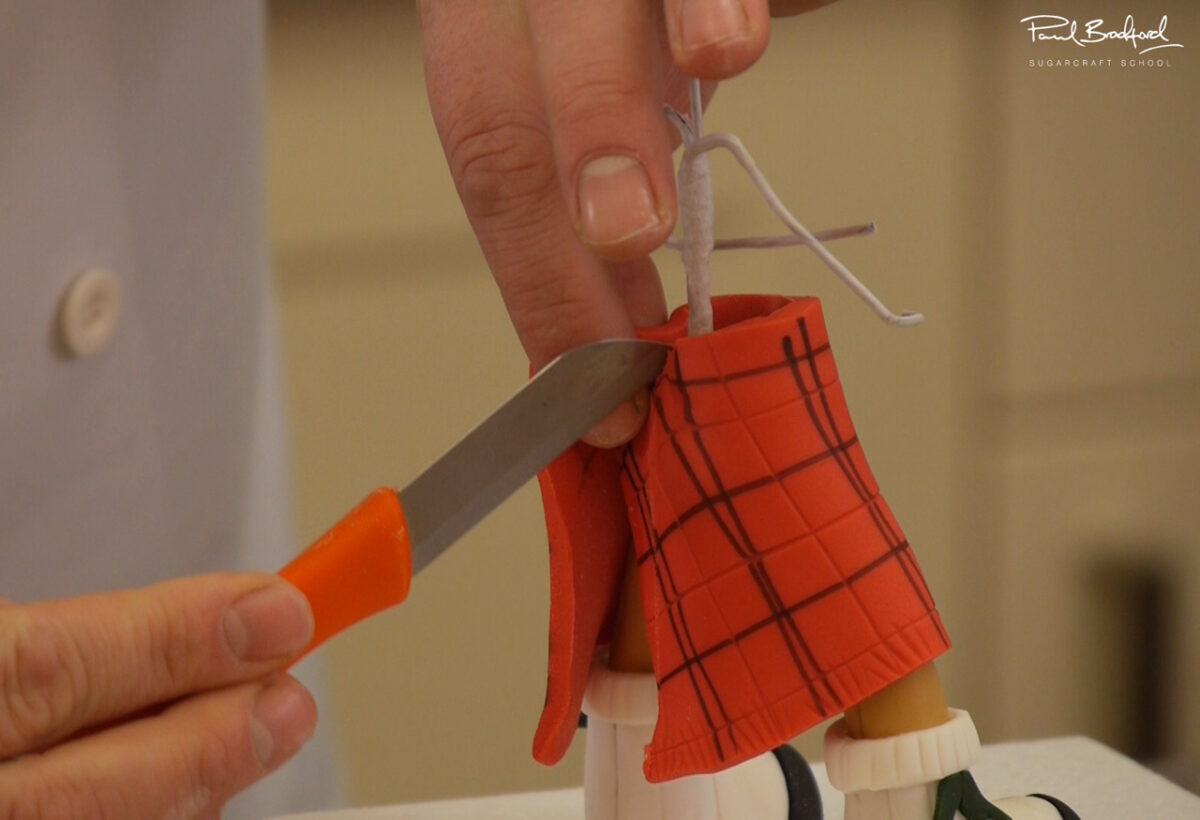
4. Making the Kilt
With the legs in place we can start to create the kilt. The kilt consists of red sugarpaste with a tartan design added using a black edible food pen, the tartan is then wrapped around the midsection of the piper and trimmed to fit.
04:58
5. Marking the Cake
In preperation for the royal iced design on the cake we now measure and mark equal section of the cake. A folded circular piece of paper is used which makes the perfect guide when marking your cake.
06:48
6. Royal Icing and Stars
With the equal sections of the cake marked, a 1.5mm piping nozzle is used to pipe royal icing onto the cake
11:49
7. Making the Body
A dark green coloured sugarpaste is selected to create the body of the piper, this is a nice contrast from the red kilt and can be attached using the same method as the legs. Details to the jacket can be added using a stitching tool and small strips of white sugarpaste.
19:13
8. Arms and Bagpipes
The arms are added next using the same dark green sugarpaste as the jacket, the bagpipes are created with the same red sugarpaste as the kilt and tartan design is added using an edible black food pen. Some other smaller details are also created and added to the bagpipes and Scotsman model.
04:01
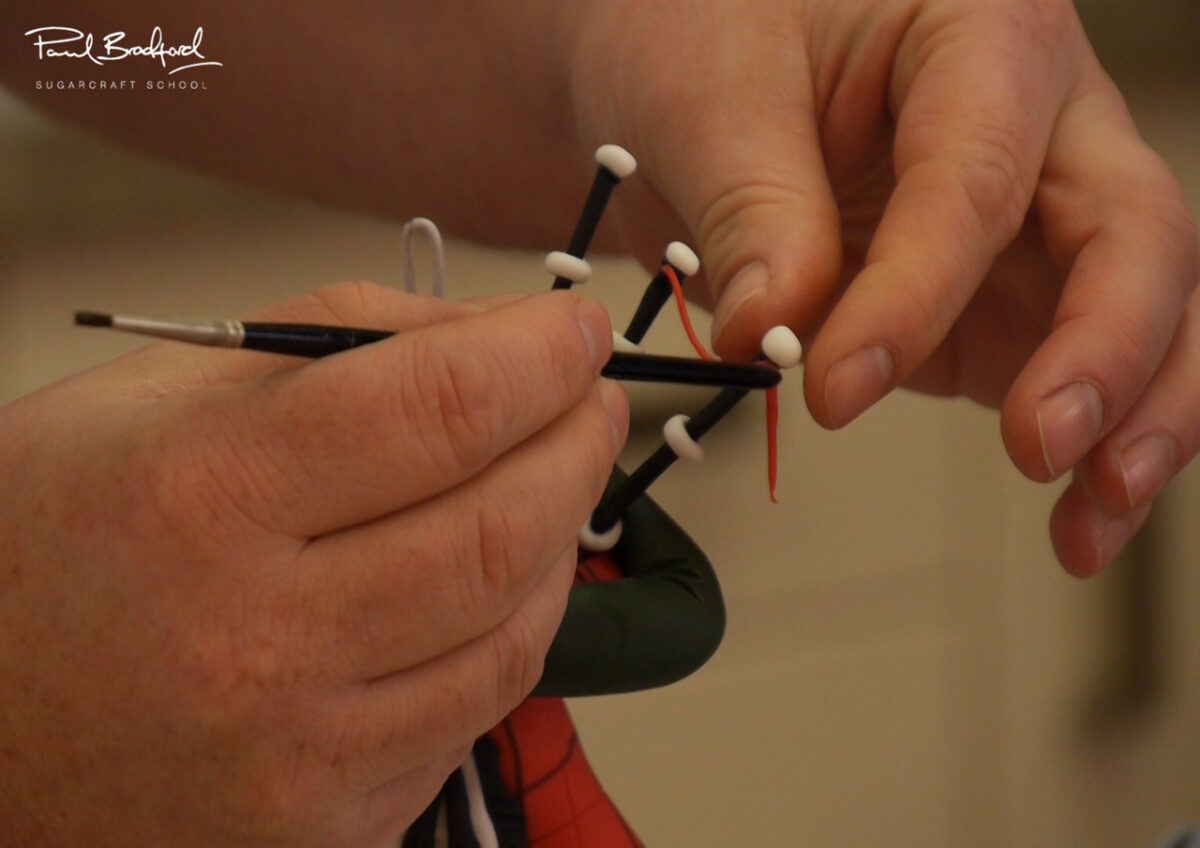
9. Bagpipes (Continued)
More pipes (drones) are created using florist wire, black sugarpaste and white sugarpaste to add to the bagpipe. A fetching red sugarpaste ribbon finishes the bagpipes off nicely.
28:23
10. Making the Head
A small polystyrene ball is used for the head, sugarpaste can then be used to build up the facial features like the big inflated cheeks. Once the head is attached you can add the detail to the face and make sure everything is in the correct proportions.
13:56
11. Adding Details
Extra details are added to the face and onto the pipers clothing. The mouthpiece is simply a black piece of sugarpaste with florist wire which can be inserted into the bagpipes to make it look like the piper is really piping!
06:55
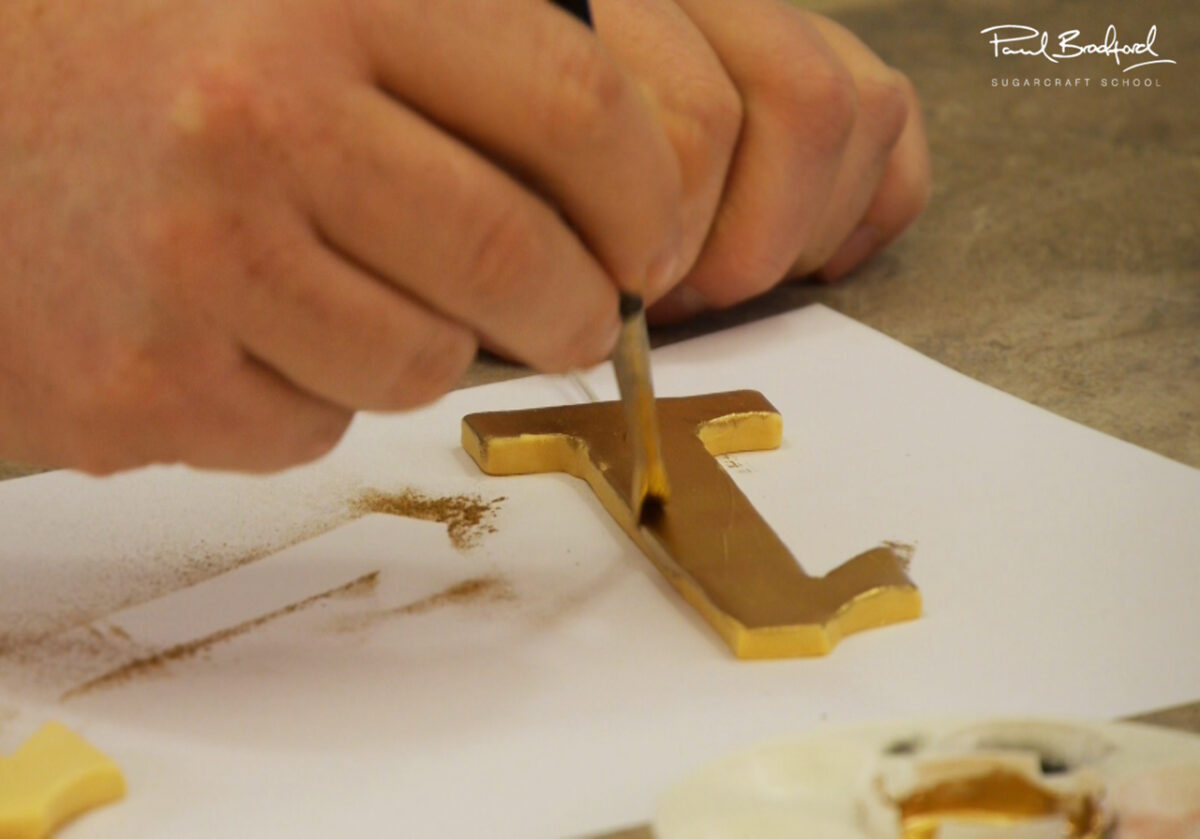
12. Numbers and Icing the Board
Ice the board using the wrap-around technique and try to keep the icing as even as possible. Paul uses the fantastic Claire Bowman gold dust combined with alcohol to paint the realistic gold finish onto the number 1’s.
04:57
13. Adding the Model to the Cake
Paul uses a dummy cake during this lesson so we can simply insert the model and numbers directly into the cake. If you’re using a real cake remember to use posy picks to separate the metal wire and the cake and avoid any potential contamination.
01:55
14. Other Ideas
Paul shares some other ideas for this cake (don’t worry that wasn’t really vodka…we don’t think!)
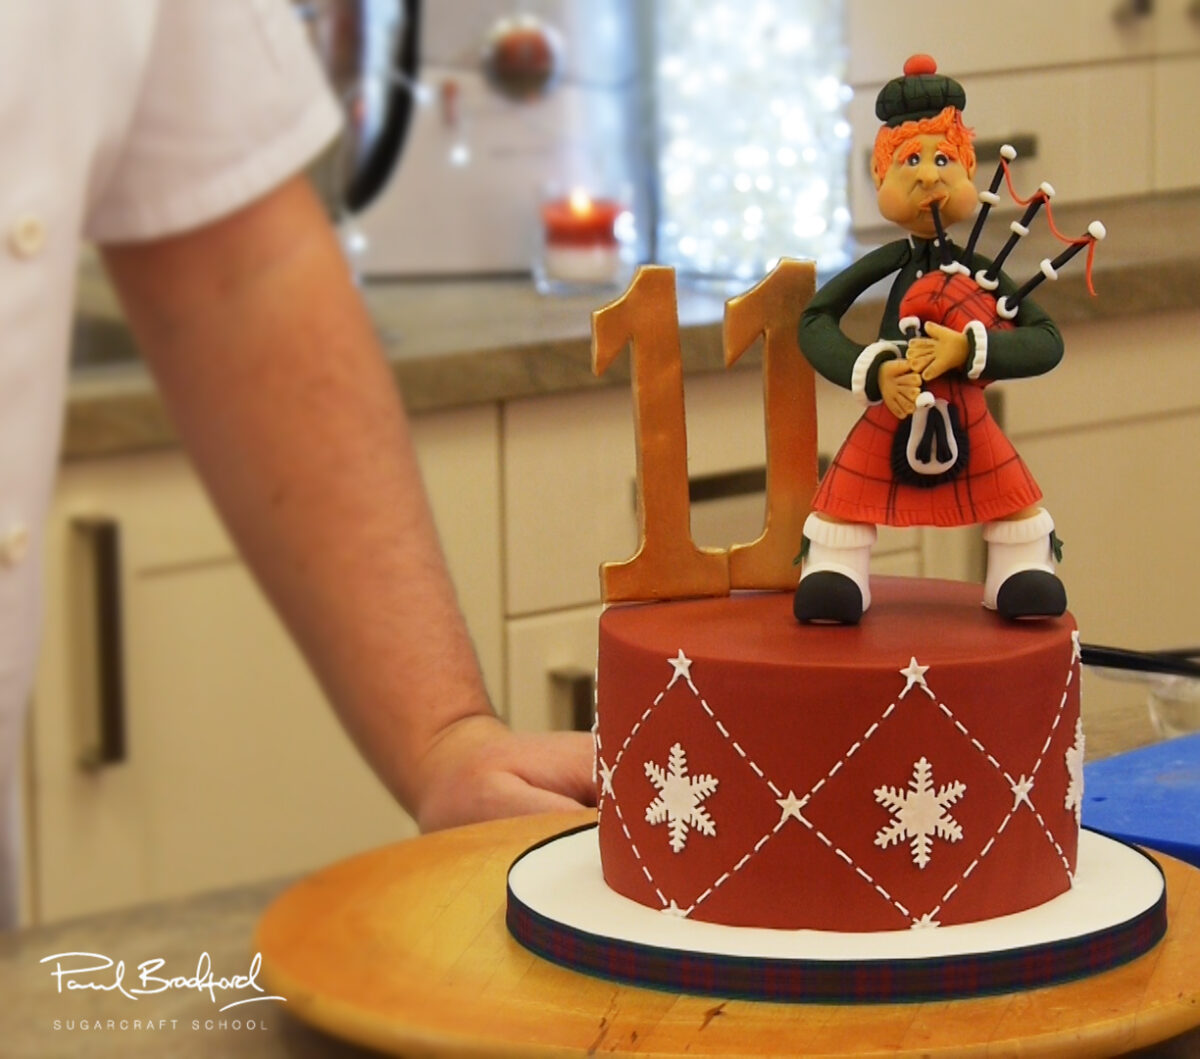
Created as part of a twelve days of Christmas collaboration Paul shares his bagpipe Scotsman cake design which features a Scottish twist with an armature based bagpipe player, bagpipes and even a kilt!
Crafting the Foundation
- Carving the Base:
- Begin by shaping the base of the cake into a sturdy rectangular prism using a serrated knife.
- Ensure clean and precise cuts to create a stable foundation for the cake.
- Baking the Layers:
- Bake multiple layers of cake batter to achieve the desired height for the Scotsman figure.
- Cool the layers completely before assembling the cake.
Sculpting the Bagpipes
- Forming the Bag:
- Fashion the bagpipes from fondant or modeling chocolate.
- Mold the fondant into a round shape and attach it to the front of the cake.
- Add texture and details to resemble the actual bagpipes.
- Creating the Chanter:
- Craft the chanter, the melody pipe of the bagpipes, using fondant or modeling chocolate.
- Shape it into a slender, elongated tube and decorate with intricate patterns.
- Attaching the Drones:
- Sculpt the drones, the bass pipes of the bagpipes, using the same materials.
- Position and attach the drones to the bag to complete the bagpipes.
Assembling the Scotsman
- Carving the Head:
- Carve the head of the Scotsman from fondant or modeling chocolate.
- Capture the distinct features of a traditional Scotsman, including the kilt, sporran, and bonnet.
- Attaching the Head:
- Position the head on top of the bagpipes, ensuring a seamless connection.
- Add details such as the beard, mustache, and eyebrows to bring the Scotsman to life.
- Decorating the Kilt:
- Drape a fondant kilt around the Scotsman’s waist.
- Use a variety of colors and patterns to create a vibrant and realistic kilt.
Finishing Touches
- Adding the Sporran:
- Craft a sporran, a traditional Scottish pouch, and attach it to the kilt.
- Decorate the sporran with intricate designs and embellishments.
- Placing the Bonnet:
- Position the bonnet on the Scotsman’s head, paying attention to the angle and tilt.
- Add a feather or other adornments to enhance the look.
Presentation
- Arranging the Cake:
- Place the cake on a serving platter or cake stand.
- Surround the cake with Scottish-themed decorations, such as heather, thistles, or tartan ribbons.
- Serving the Cake:
- Slice the cake and serve it to your guests, allowing them to admire the artistry and enjoy the delicious taste.
We would love to see your take on the Crystal Wedding Cake – please share your photos with us on our Facebook Page!
Want to see more then check our full Cake Tutorial Library.