Tutorial Preview
Three Peak Chocolate Wrap
with Paul Bradford
Skill level:
Intermediate
HD Lessons:
13
09:30
1. Cake - Lesson 1 – Ganaching and Stacking
Paul starts off the course by preparing the tools needed and goes straight into stacking and filling the cakes and adding dowels for strengthening.
05:30
2. Cake - Lesson 1 – Ganaching and Stacking – Part 2
The stacking of the cakes continues to accomplish the large height of the cake, then ganache is added – You might have to take some shelves out of the fridge to refrigerate this one after ganaching!
03:35
3. Cake - Lesson 2 – Top Shape
Lesson 2 shows you how to quickly produce the cone shaped top paper section of the cake with ease.
10:44
4. Cake - Lesson 3 – Carving the Cone Shape
Using the previous lessons cone shape, Paul shows you how to carve the rest of the cake to match and then finishes off with a ganache layer. After this try and keep the cake in a cool breeze or cool area for the ganache to harden, as at this point it’s far beyond standard fridge sizes
03:02
5. Cake - Lesson 4 – Rolling out the Chocolate
Using Squires kitchen milk chocolate, Paul shows you how to prepare your chocolate by rolling it down to manageable strips which have a striking similarity to sugarpaste. Using a pasta machine will really help for this part of the course.
15:24
6. Cake - Lesson 5 – Wrapping the Chocolate – Part 1
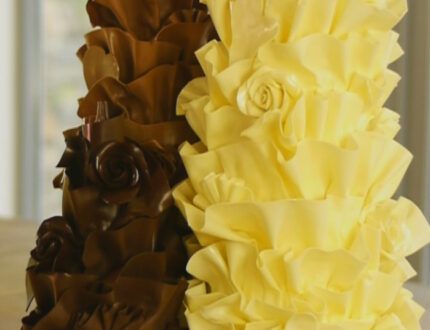
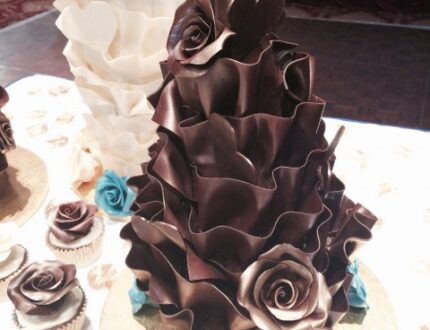
It’s now time to really bring the cake to life by wrapping the cake with the previously prepared chocolate from lesson 4. Starting from the top of the cake, Paul shows you the methods used to achieve the fantastic ruffled effect which is set to impress!
04:27
7. Cake - Lesson 5 – Wrapping the Chocolate – Part 2
Part 2 of lesson 5 covers the final part of the chocolate wrapping for a neat and professional finish to the cake, finishing this Paul shows you how to finish off the ruffles to add some definition to your work so far.
05:54
8. Cake - Lesson 6 – Making the Rose
Using white modelling chocolate, Paul shows you how to make a beautiful rose for one part of the types of decorations used on the Chocolate Wraps. You’ll need plenty of these so if you haven’t quite mastered the Rose yet there’s now plenty of practice opportunities.
02:39
9. Cake - Lesson 7 – Making the Fans and Hearts
Continuing on with the white modelling chocolate decorations, Paul shows you how to make some simple fans and love hearts for the cakes.
06:30
10. Cake - Lesson 8 – Transferring the Cake
Paul briefly talks through the making of the other two chocolate wraps for this course, then comes the daunting task of transferring the cakes to a mirror. This is most likely a two person job and don’t be afraid of handling the cake over the ruffled sections as this is a simple fix, just don’t drop it!
06:36
11. Cake - Lesson 9 – Decorating the Cakes
After the scariest part of transferring the cakes comes the relaxing job of adding the decorations we made in lessons 6 and 7. It really is up to you where you attach your decorations so let your imagination run wild and of course take some inspiration from Paul.
02:32
12. Cake - Lesson 10 – Finishing Touches
Starting by masking off the mirror, Paul adds a high gloss finish using a edible glaze spray. This really makes the chocolate jump out and look amazing, try to go easy on the white chocolate cake as this can have a bit of a yellowing effect.
01:40
13. Cake - Other Ideas
Paul explores some other ideas for this cake that will hopefully inspire you to impress! We would love to see any of your chocolate wrap creations so feel free to share them with us on our facebook page here.
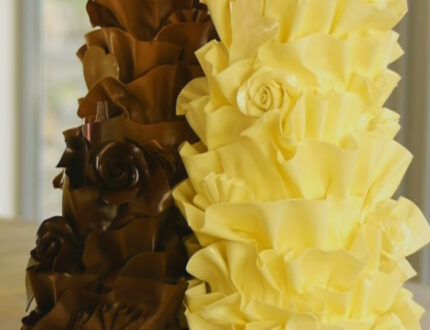
What’s better than 1 huge wow factor cake? That’s right, it’s the 3 Peak Chocolate Wrap, Paul revisits his classic Chocolate wrap cake with some updated ideas and creates a chocoholics dream, a definite stand-out wedding cake that will certainly have people gathering round for a slice!
For a better view of this cake and how Paul uses Squires Kitchen modelling chocolate check out this recent blog post here.


