Tutorial Preview
Highlights
Struggling for time? You’ve come to the right place. We have carefully selected all the key parts of this tutorial that you can view in no time at all to enable you to make this cake!
1. The Design
In this lesson, Danielle gives some top tips on how to create a mood board. This is something she always does and as you can see, she does a beautiful job of it. This is a great way to get all of your ideas and themes together.
2. The Cut-Out Decorations
Danielle starts off by explaining that some of the decorations will need around 24 hours to dry so of course these are the ones you will want to make first. This is a cake where planning is your friend so that you aren’t having to stop and start and break the flow. Danielle encourages you to make your letters freehand but of course if you are not confident doing this you can make a template by printing out fonts that you like. Simply cut them out and then laminate them if possible and cut around them.
3. Making the Ice Cream Cone
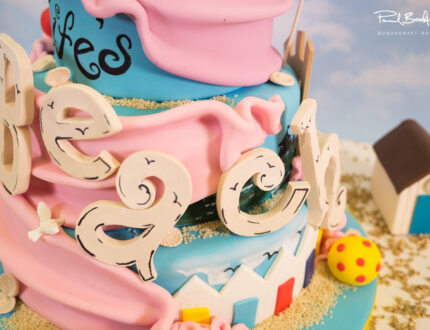
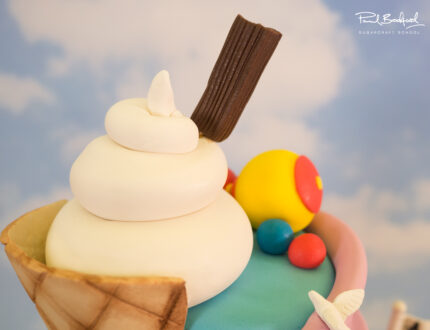
To make the ice cream cone, all you need to do is cut out a triangular shape and the shortest side has to be cut with a curve. You then mark it with a dresden tool in a chequered fashion and soften the edges. Once you have done this, simply leave it to dry over something rounded like a rolling pin.
4. Hand Shaped Decorations
In this lesson, we will be looking at making hand shaped decorations so no fidgety cutting is required. Danielle starts off by showing us how to make cute little shells. It is so simple and no moulds are required – Danielle uses a PME shell but a similar effect can be created with a knife. She then goes on to show us how to make fun beach balls with various designs.
5. Painting the Cake
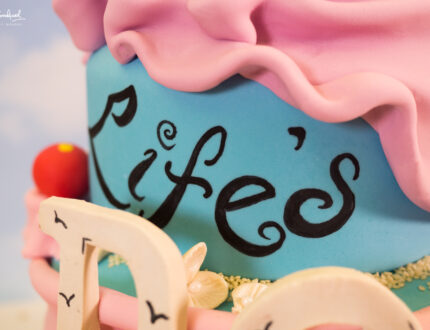
You don’t neet to be a pro with a paintbrush for this lesson, so fret not – it’s all a bit of fun and the way to start is to make the paint quite thin (adding more alcohol or rejuvenator) and make it thicker as you grow more confident. Danielle also mentions that you can practise on paper before you go onto the cake. The painted area is quite small so it’s all about the small, delicate movements.
6. Dusting and Painting the Decorations
Don’t worry – Danielle shows us how to make the ice cream cone in the next lesson. In this lesson Danielle shows us how to add extra interest and dimension to otherwise very flat looking decorations. All with a tasteful amount of dusting and carefully mixed dusts. This would be a very clever way of adding something extra to stitch work such as on handbag cakes and so on. When it comes to painting on the letters Danielle uses the zero paintbrush and adds detail the edges of the letters and paints in a similar style to the letters that she painted on the cake.
7. Making the Beach Huts
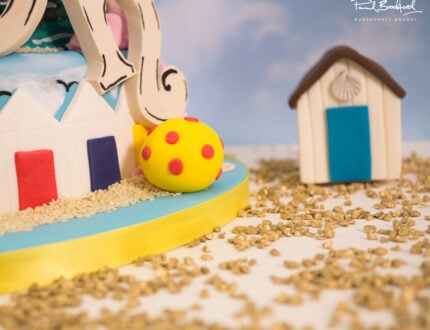
In this lesson, Danielle shows us how to make some sweet little beach huts to add to the bottom tier of the cake. If you plan ahead with your painting as Danielle has, the painting will work around the beach huts. You can make this as detailed or as simple as you like and you can even add some dusting to them as with the cut out decorations made earlier.
8. The Wrap Technique
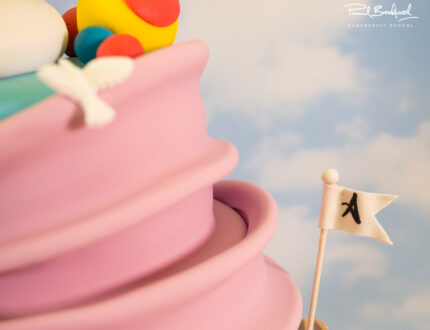
This is a beautiful technique that anyone of any level can replicate and can be used in so many ways. The basic idea is to create a piece of sugarpaste that looks like soft folded material wrapping around the cake. To do this, simply create a fat croissant shape of sugarpaste and then roll it out flat to around 2mm in thickness and it should have a lip shape. You then cut out a more defined lip shape and smooth the edges with your finger. Fold the edges under themselves all around the piece of sugarpaste to create a nice rounded edge. To finish you create a crease by putting your middle finger under the sugarpaste in the centre, and running it along while simultaneously gently pinching it with the thumb and index finger of your other hand.
9. Finishing Touches
We’re almost there! Just a few more decorations and it’s all done. To start off, Danielle makes some realistic and tasty looking ice cream for the cone. She creates a long thick rounded sausage shape of sugarpaste that gets thinner at one side. She then drops it into the cone in a swirl shape and shapes the very top into a gentle flick. For the chocolate flake, it’s even easier. A 1cm thick cubed rectangle lightly marked with a knife or dresden tool does just the trick. Danielle uses sesame seeds to recreate sand but of course if you are making this for someone with an allergy, then you can substitute these with coloured sugar or broken up biscuits.
10. Other Ideas
In this lesson, Paul shares some ideas that you can implement into your version of this cake to make it unique to you. We would love to see your beach-themed cakes so please share them with us on our Facebook Page!
11. Pro Lesson
Danielle goes into detail about the cost to make this cake as well as how to price it – useful tips for every professional cake designer.
The fantastic Danielle Gotheridge introduces us to this equally fantastic beach themed three-tier wrap cake. In amongst all the brilliant modelling you will learn, you will also learn Danielle’s much sought after material wrap technique. All of the ideas and skills taught in this tutorial can be adapted to create cakes to suit many occasions. This tutorial is aimed at beginner to intermediate level and takes approximately two days to make, allowing for drying time.
Click here to watch an interview with Danielle Gotheridge.
Danielle Gotheridge
Multi Award Winner Danielle Gotheridge has been designing wow factor cakes for over 10 years and has taught herself and created techniques for 5 years. Danielle’s fresh approach to edible art has attracted thousands over the years, leading her to produce cakes for many celebrities including Justin Beiber, Pauline Quirk, The Wanted and many more!
