Tutorial Preview
Skill level:
Easy Cake Decorating | Cakeflix - Beginner Level Courses
HD Lessons:
11
13:18
1. Royal Icing Ingredients and Recipes
In this lesson, Ceri shares his extensive knowledge of royal icing recipes including precautions to take when making royal icing (avoid grease contamination for starters!) along with his knowledge of instant recipes that are available. By the end of this lesson, you will know not only which ingredients are in a basic royal icing recipe but also what the better ingredients are. The amount of different ingredients/products to choose from can be intimidating but fear not – Ceri is here to give you lots of straight forward advice. Click here for Ceri’s royal icing recipes
18:28
2. Royal Icing Ingredients and Consistencies
So now we’re making royal icing and along the way, Ceri shares some knowledge about his preferred equipment, bowls and tools. This lesson is full of handy tips such as how to prevent that icing sugar cloud and some simple but useful practices that will make your life so much simpler. Ceri then shows us how to get the three most popular royal icing consistencies and explains their different uses.
03:58
3. Royal Icing Premixes
Ceri talks us through royal icing premixes and discusses their pros and cons. If convenience and speed is your priority then premixes are a good option, but just be wary of the water content suggested on the back. Ceri would recommend going for a little less water to avoid making it too runny and adding more as you go along. It can be quite expensive but you can be the judge of whether it’s worth it or not as it is extremely convenient.
05:55
4. Colouring Royal Icing
Colouring royal icing can be a little tricky. Ceri demystifies this for us in a matter of minutes. First of all, he approaches paste colours and gel colours. The general consensus is – avoid them! Then it’s on to dust and liquid colours and Ceri covers the pros and cons of both and when is best to use either.
07:49
5. Piping Bags
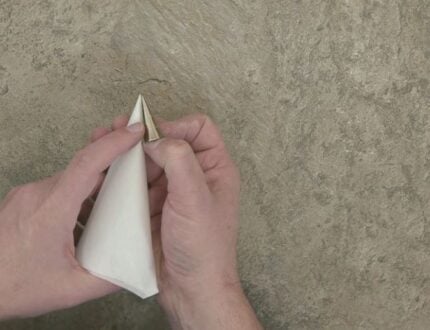
In this lesson, Ceri addresses the various types of piping bags available and in true Ceri fashion, gives us the pros and cons of each bag. Ceri prefers plastic for bigger projects and paper bags for smaller projects. He then goes into the different types of paper used to make piping bags as well as the different techniques used to make them. There are certain ways to fold and cut your bag which will give it extra strength and accuracy and Ceri discusses his preferred technique – the “Wilton W”. If you are unfamiliar with this, then stay tuned to find out more.
12:50
6. Piping Nozzles/Tips
This lesson covers piping nozzles or tips, depending on what you prefer to call them. This is a whole new world and definitely not something you want to just guess at, so this lesson along with a little further research will make you an expert. First off, Ceri recommends Bekenal piping tips as they are the best quality he has come across second to the PME Super Nozzle. If you happen to be able to check piping nozzles hands-on and not online, see if you are able to squash them with your fingers and if you are…avoid them. Soft metal is your enemy! Ceri then goes on to teach us how to take care of our piping tips and goes onto discuss how to attach them to piping bags and the different attachments available.
03:58
7. Piping Bag Techniques
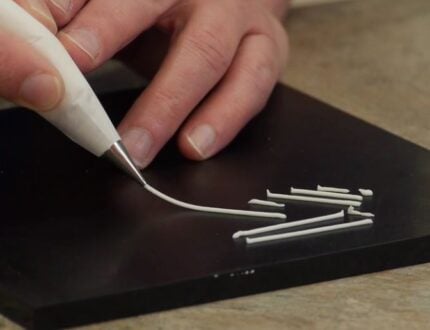
There are many different ways of hold a piping bag and it can get confusing. Ceri shows us what works for him to enable you to get your piping technique just right. Expect plenty of useful details including where in your hand to hold it, which muscles to use, folding techniques and so on. This lesson is packed full of easy practices that will make your life so much easier.
03:51
8. Using Finer Piping Nozzles
You may use these nozzles very infrequently, but it’s still useful to know what’s what. In this lesson, Ceri shows us what precautions to take when using royal icing with finer piping nozzles. We have one word for you – nylons.
04:34
9. The Angle at Which to Pipe
In this lesson, Ceri takes us through some basic technique musts when piping. Don’t worry if you are left-handed, you won’t be left out… Ceri thinks of everything! Just remember 45 degrees, a slightly damp paintbrush and gravity are your best friends.
03:15
10. Piping onto the Side of a Cake
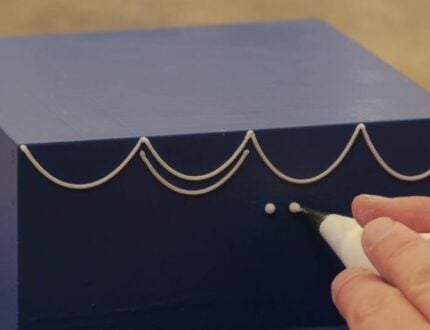
Now it’s time to see some piping in action! Ceri shares some different techniques when piping onto the side of a cake. The general rule of thumb is to let the royal icing and gravity do the work. If you try and control its movement too much you will very quickly end up with uneven piping. It may seem unnatural at first but as your confidence grows, it will become instinctive.
11:20
11. Run-out Work
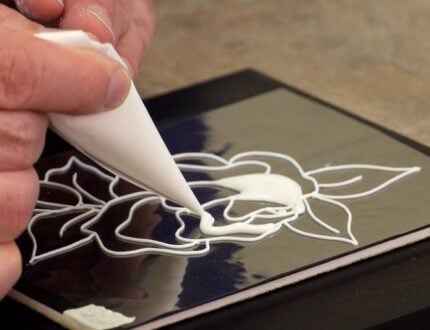
In this final lesson, Ceri demonstrates run-out or flow work. This is a type of piping work that consists of creating or filling in shapes as opposed to drawing lines and so on. It might sound simple but it can end up looking messy if it’s not done properly – rogue air bubbles, curved edges and all the other horrors. Ceri gives us some simple and straightforward tips to keep those nightmares at bay.
The fantastic Ceri Griffiths teaches his unmissable Beginners’ Royal Icing Course. This tutorial will cover everything from royal icing recipes, premixes, equipment used, the best piping nozzles/tips, colouring royal icing, which piping bags to use and how to make your own, to demonstrating run-out or flow work. This tutorial is packed full of tips, so grab a notepad before you hit play.
We would love to see examples of your piping work – please share your snaps with us on our Facebook Page!
For this tutorial, all you’ll need is a batch of royal icing.
For this tutorial, all you’ll need are piping bags and nozzles.
Ceri Griffiths
Ceri DD Griffiths is an internationally recognised expert in his field of royal icing and as such travels extensively. From baker and confectioner to professional dancer, cake artist and much more, Ceri’s own eclectic style of cake design and flare is made up from the many varied elements of his life. As a widely travelled teacher and demonstrator, Ceri Griffiths firmly believes that sharing knowledge and skills is the only way in which cake decorating and design can grow.Comments
Add a Comment



Amazing!
Thank you for all of your expertise. I have learned so much more. Brilliant.
Thanks mrsrdc. Very grateful for you taking the time to comment 🙂
thank you Ceri~~ i learned a lot!
Glad you enjoyed the course daymuffin:-) xx
Very informative 🙂 Excellent teacher 🙂
Lol After 35 years of making flowers,Ceri has inspired me and i now want to be a royal icer, thank you Ceri
Very informative. Thank you for the tips to know when its at the right mix. You explained it really well thank you Ceri xx
Thank you for this informative tutorial. Wish I had found it sooner especially colouring red and black. Will be getting out my dust colours in future!
Hi Ceri! In lesson 2, the reaction between egg whites and acid it’s called denaturation. Egg whites are protein, and proteins can be denatured through exposure to heat, acids or chemicals. Denatured proteins lose their three dimensional structure and their function.
Thanks Irene, we appreciate your input 🙂
Really helpful course. .. Many thanks 🙂
Thank you, Ceri, for sharing your wealth of experience. So many great tips.
Shirley Phillips, Canada
Thank you Ceri. This is a very informative tutorial. I appreciate all of your tips.
So many helpful tips to practice, thank you.
I always love how Ceri explains everything. Thanks so much Ceri! ❤
thank you so much <3
Thank you Ceri, wonderful course. Very helpful.
Brilliant Ceri, really good tutorial. May I ask which consistency I would use to stencil the side of a cake?
Thank you
Thanks for your lovely feedback. You would use soft peak royal icing for stencil work on the side of a cake.
Great tutorial Ceri very well explained I learned so much thank you.
most enjoyable I learnt a lot I know where I have been going wrong thankyou xx
Excellent tutorial, extremely informative.
Thank you so much for such wonderful teaching. I shall watch this time and time again, then perhaps I’ll
have the confidence to really give it a try.
Thank you so very much your a great tutor made everything look easy and encouraged me not to give up on my royal icing, My icings in the past have been to hard or just to wet.
Most amazing and useful class. Thank you so much.
Thank you for the tips..very informative..great, entertaining teacher !!
Always been nervous of royal icing but I can’t wait to have a go now. Thanks so much.
Thank you Ceri. It was very informative and i’ll make the royal icing now and will share my experience. You have explained everything so well.
Ceri, that was a really excellent course. It covered all aspects and probable questions regarding royal icing.
Cheers!
Hi sir, what is the consistency of butter cream for piping does it need to be firm from the fridge or its okay to use the normal soft room temperature one to get the nice finishing of the designs? And any other techniques for butter cream icing to follow?
TIA
Hi Vanitha, for the best results it’s better to use buttercream at room temperature. I note that you have asked on a royal icing course, but it’s also best used fresh.
We are looking for buttercream artists to film tutorials for us so watch this space!