Tutorial Preview
Highlights
Here we have carefully selected the key parts from the entire tutorial and condensed it into an 12 min long video. More than enough to get you started without taking too much time.
1. The design
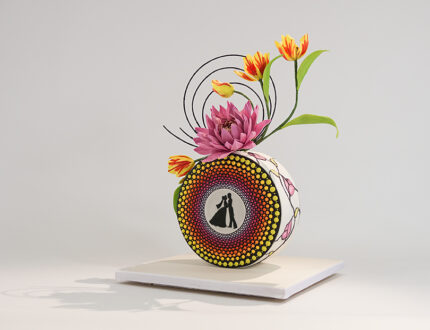
This unique, beautiful and clever design may leave you wondering just how she does it – and all will be revealed in this lesson. Here Anna Maria explains how to make the structure and how to make it food safe, along with other measures such as protecting the dummy and the cake. You’ll be pleased to know the structure is very straightforward, simple and quick, but with brilliant results.
2. Preparing the cake
Here she gets the cake ready and cuts it to size for the cake dummy. She is a little concerned about the weight of the cake so inserts two plastic dowels to keep it secure. Now that the cake is nice and round it’s time to move on to ganaching.
3. Ganaching the cake
In this lesson Anna Maria puts on the first layer of ganache and gets it lovely neat and round. Once this stage is complete you need to let it firm up for 15 mins or so before moving on to adding the second and final layer. Anna Maria uses a great technique for getting a lovely neat top, which you’ll love and no doubt use from here on.
4. Covering the board
In this lesson Anna shows us how to cover the board and how to get a lovely bevelled edge all the way round.
5. Covering the cake
Here she shows us a brilliant technique for covering round cakes while maintaining a sharp edge. Be careful not to roll out your sugarpaste too thin, especially if you’re covering it in white sugarpaste, as you may be able to see the dark ganache coming through. If this happens you can always cover it in another layer of sugarpaste but it’d be a good idea to allow the first layer of sugarpaste to dry before doing this.
6. Making the tulip bud and petals
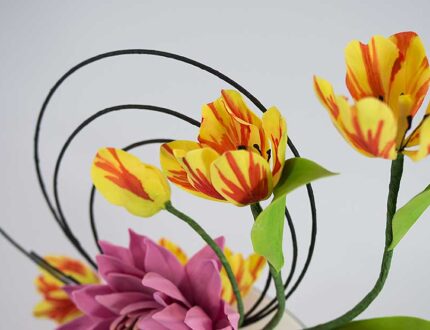
In this lesson she show us how to get the flowers ready for putting them all together. The first stage is colouring all the stamens and then inserting them into the little styrofoam balls. Then it’s just a case of cutting and veining the leaves, and adding them to the styrofoam balls. Here she shows us how to make the leaves for the tulip without using any cutters or veiners. The templates used are available in the templates section below. It’s a very quick and effective way to make leaves.
7. Making the dahlias pt 1
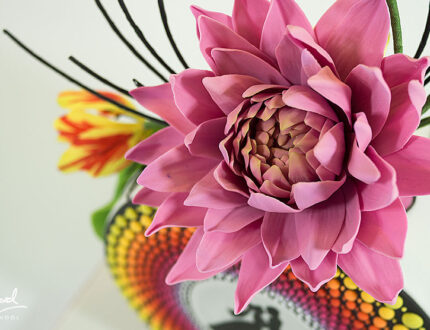
Here Anna Maria shows us how to make the cute dahlias using a dahlia cutter, along with a clever way of using a very thin cell stick or plastic knitting needle. She then goes on to show us how to add the petals to the styrofoam ball without damaging them, using soft foam which is very helpful.
8. Making the tulip leaves and painting the petals
In this lesson we are shown how to make the tulip leaves using the templates which are available for download from the templates section. She demonstrates how to vein them using a small cell stick.
9. Adding the last dahlia petals
Here she shows us how to arrange the final set of petals on the Dahlia now that it has dried. She then sets it aside to dry a little longer before moving onto dusting it.
10. Making the plaque
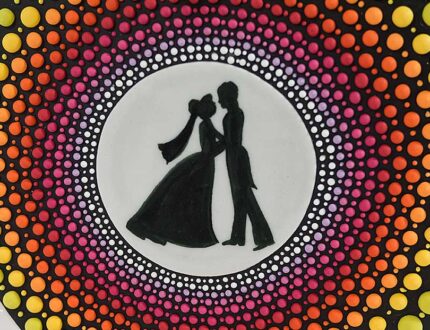
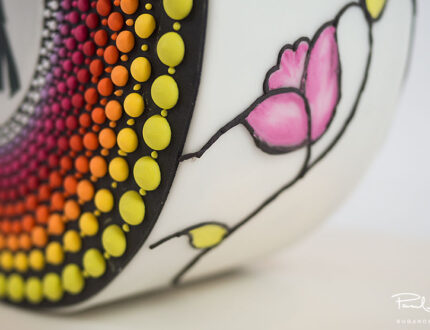
While the flowers are drying she shows us how to prepare the plaque, which will then be painted with a lovely silhouette of a bride and groom.
11. Preparing the wired circle
In this lesson Anna Maria shows us how to turn aluminium wire into a pretty circular decoration that will sit beautifully on the cake.
12. Airbrushing the leaves
In this lesson she airbrushes the leaves with a mixture of colours to create a lovely tone for the leaves. Now it’s time to let them dry and then attach them in the next lesson.
13. Arranging the flowers on the circle
Here Anna Maria shows us how to paint the tulip petals in a lovely red tone. She then shows us how to arrange the first set of them on the flower using dental floss.
14. Painting and attaching the tulip petals
In this lesson Anna Maria brings the tulips together in her own magical way.
15. Piping onto the plaque
In this lesson she begins adding the beautiful multi coloured piped dots to the plaque. All the colours used to create the various colours of royal icing are listed in the ingredients section below. Remember to only fill the bag with a very little amount, which will give you more control – and although means re-filling more often, is definitely worth it.
16. Decorating the sides
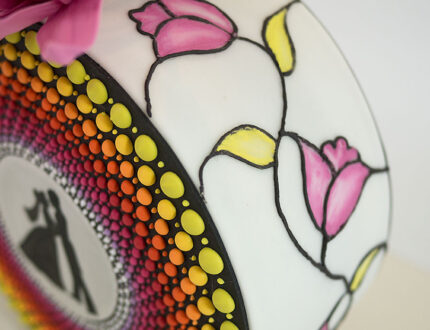
Here she shows us how to trace the lovely design onto the side of the cake using the template which is available in the templates section. You will want to have a 2b pencil for this part. Once traced, the design is then piped over.
17. Finishing the sides and attaching the plaques
Here we see it all come together with Anna Maria finishing the piped design, adding the cake to the board and then attaching the plaques to either side of the cake.
18. 18 - Finishing Touches
In this lesson she finishes off the design completely by dusting the Dahlia and then arranging the flowers onto the cake using posy picks and some sugarpaste. What a stunning cake! In the following lesson she’ll be sharing some other ideas you can use when making this cake.
19. Other ideas
Here Anna Maria shares some other ideas you can try your hand at when making this cake. We’re sure you have some of your own great ideas and we’d love to see what you come up with.
Share your lovely pics with us on our Facebook page.
20. Pro lesson
In this lesson, Anna Maria shares some insider information about the cost to make this cake, as well as pricing, portions and other vital information for any professional cake designer.
We’d love to see your take on the Circle of Love Cake – so make sure you share your snaps with us on our Facebook page.
Anna Maria Roche | Expert Tutor at CakeFlix
Since she was a child, Anna Maria has loved baking, drawing and creating weird and wonderful things with clay. Having parents who were restaurateurs in a small village in Austria, Anna Maria grew up to appreciate food and the work that went into it. Being in a family with five boys, she loved escaping to the kitchen cooking sweet treats for them, although there were many fights with cookies and cakes being taken before they were decorated!
At sixteen, Anna Maria started as an apprentice chef and later specialised as a Pastry Chef. After training she worked in some leading hotels in Austria and Switzerland.
Whilst working in Switzerland, Anna Maria came across her first piece of sugar art and was immediately hooked on this exciting and creative aspect of the industry. Her first and lasting inspiration was a wedding cake loaded with sugar flowers, making it love at first sight.
From that moment in 1987, Anna Maria knew she wanted to specialise in traditional wedding cakes and sugar art.
This made her cross the ocean and migrate to Australia
Anna Maria arrived down under with very little knowledge of the language, planning initially to work for a year and learn the art of cake decorating. However, she fell in love with the country and calls Australia her home.
She worked for some of Sydney’s top hotels and cake shops, including Sweet Art and Planet Cake, designing and creating cakes for people from all walks of life.
During her seven-year career at Planet Cake, she pioneered the teaching programmes for the successful school and was the creative force behind some of the most recognisable and original cake designs. Anna Maria was also the creative force behind three of the books published by Planet Cake and her work has been featured in many magazines.
She was also a popular personality in the award-winning Lifestyle Channel TV series, “Planet Cake”
Anna Maria has successfully taken part in many prestigious cake competitions and has won many awards; She likes to get out of her comfort zone to challenge herself, inspiring others in the process.
In October 2013, Anna Maria founded her own business; “Anna Maria Cake Design”. Besides designing and creating gorgeous cakes, she creates tutorials for companies to promote their cake decorating supplies and equipment. She conducts private lessons and small workshops in her studio in Sydney and teaches cake decorating in other schools across Australia and overseas.
Her diverse combination of qualifications, abilities and passion, together with her formidable creative skills has enabled her to inspire students around the world. She is very proud to see how their individual journeys have progressed. Many have gone on to have successful businesses of their own in Australia and overseas.
