Tutorial Preview
Bite Sized
Watch this tutorial in a super fast time!
Highlights
Short of time? Watch the highlights here in under 20 minutes!
1. Discussing the design
Paul starts by discussing the background to this one-tier wedding cake.
2. Cutting out the leaves and petals
This is the laborious part of the tutorial so get the kettle on, maybe Netflix, and cut out the wafer paper petals and leaves as listed below:
PETALS USED:
LILY:
Large – 21
Medium – 37
Small – 16
PEONY:
Medium – 8
Small – 22
ROSE:
Medium – 20
Small -15
LEAVES:
Medium – 12
Small – 60
3. Colouring the flowers
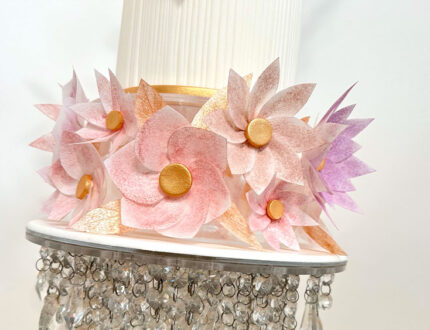
This is where the flowers come to life when you add a gentle dusting of your colour choices.
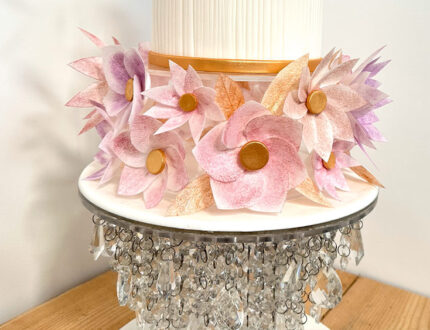
4. Adding the flowers to the stand
Paul now delicately assembles the flowers onto the stand, ensuring that the positioning compliments the the design but also minimises any breakages.
5. Decorating the middle tier
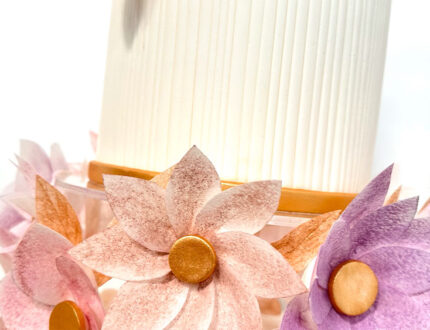
Paul creates a very striking, but simple, ribbed effect for the middle tier.
6. Adding the Flower Centers
Paul now cuts out, colours and then adds the flower centers.
NOTE: Apologies for the volume echo on this audio track.
7. Making the Top Tier Floral Display
Paul now creates a beautiful top-tier floral display from wafer paper flowers.
8. Finishing Touches
Paul now completes this lovely design with the all-important finishing touches.
9. Other Ideas
Paul shares different ways to use the skills learned here for different designs.
10. PRO Lesson
Paul shares some pricing tips and the best ways to make a profit from this design.
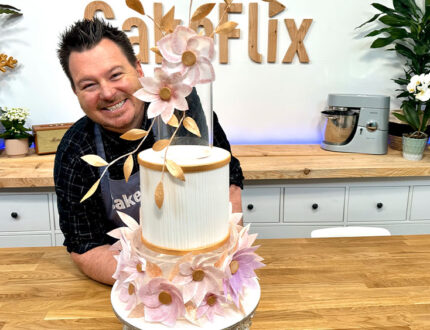
Floating Fantasy Wedding Cake Tutorial by Paul Bradford
This Floating Fantasy Wedding Cake tutorial shows what you can achieve in terms of design when given the remit to create a one-tier wedding cake. Using Prop Options acrylics and a creative flare, a one-tier cake can be every bit as exciting as the more standard 3-tier creations.
Paul talks through lots of extra hints and tips along the way. When Paul posted this design on social media one of the neighbours immediately looked to order it!
In the following tutorial, you will learn how to…
- Create a 3 tier design from a 1 tier cake
- Create simple elegant flowers using wafer paper
- Arrange flowers on an acrylic tier
- Create a simple ribbed effect on a double-height cake
- and lots, lots more
Single-tier wedding cakes can be beautiful and elegant, offering a minimalist and modern aesthetic. They are a great option for intimate weddings or smaller venues, and they can be customized to match any wedding theme or color scheme.
Here are some additional tips for creating a beautiful one-tier wedding cake:
- Choose a simple yet elegant design. A single-tier cake is the perfect canvas for a clean and sophisticated look. Avoid overly ornate decorations or embellishments, and opt for a simple design that highlights the cake’s natural beauty.
- Use fresh flowers or greenery. Flowers and greenery can add a touch of elegance and whimsy to your cake. Choose flowers that are in season and that complement the color scheme of your wedding.
- Add a cake topper. A cake topper is a great way to personalize your cake and add a touch of whimsy. Choose a topper that reflects your personality or wedding theme.
- Serve your cake on a beautiful cake stand. The cake stand is an important part of your cake’s presentation. Choose a stand that is the right size and style for your cake, and that complements the overall look of your wedding decor.
With a little creativity, you can create a one-tier wedding cake that is both beautiful and elegant.
Don’t forget to share your interpretations of this wonderful cake with Paul and the rest of the CakeFlix community on our Facebook group.
View hundreds of more world-class tutorials only at www.cakeflix.com.


