Tutorial Preview
1. Carving and Ganache
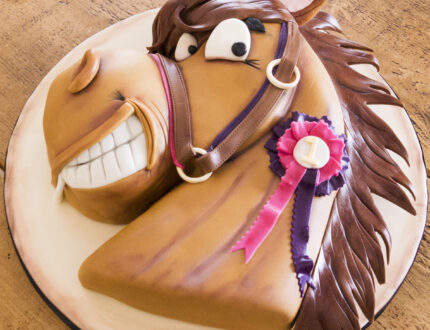
The cake creation starts with two 8 inch square cakes, it’s also recommended to download and print out the horse template on the link above. Using the template you can cut the cakes and a cake board to the correct size that correctly fits the template. The cake is also cut horizontally and filled with a luxurious ganache centre, following this ganache the entire cake and then refrigerate to firm the ganache up (making it easier to work with).
Tip: Try to make the shape as rounded as possible when carving.
2. Ganache (Continued)
3. Icing
A teddy bear brown sugarpaste is used to ice the cake, it’s not a very conventional shape so keep an eye on Paul’s technique here. Concentrate underneath the horses chin to begin with, if you face difficulties with heat and sugarpaste cracking (as Paul did) you can patch up smaller sections as shown.
Tip: You can also ice the cake with white sugarpaste and airbrush later if preferred.
4. Features
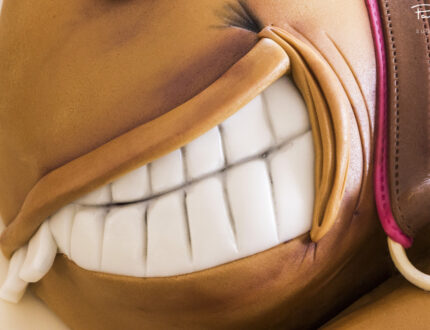
The first of the features to be worked on is the nose and mouth section, Nostrils are created as a simple tear drop shape which is then pressed in and blended and attached to the horses nose. For the teeth a smile is cut out of the sugarpaste layer (mark this out of paper first if you’re not sure how it will look) and a similar shape as what you’re just removed is then cut using white sugarpaste. Details and outlines are added to the teeth using a selection of PME tools.
Tip: Try to make the features as fun as possible!
5. Features (Continued)
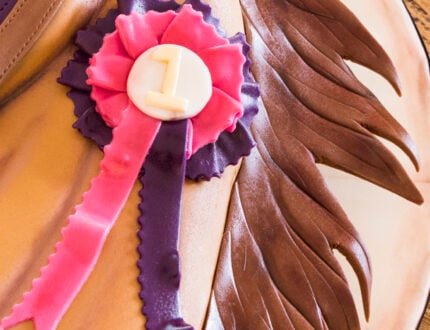
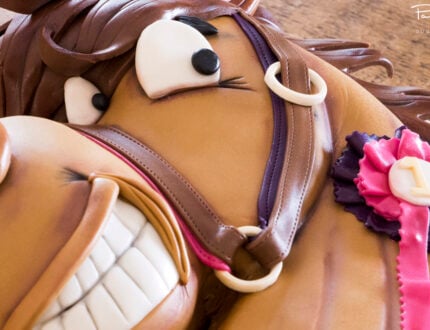
The features of the cake are continued here, firstly with the addition of the horses mane. Roll out a sausage shape of a darker brown sugarpaste cut down to the length of the back section of the horse cake. Cut out V shapes from the mane piece and smooth off by hand, follow this by adding hair details using the PME tools. To attach the mane first apply an edible glue on the cake and then insert cut down pieces of spaghetti which will add strength, then place the mane on top as shown. Layered triangle sections of brown sugarpaste are added to the top of the head to form the horses quiff of hair.
Tip: Use tylose powder mixed in with the sugarpaste to make stronger hair.
6. Eyes and Ears
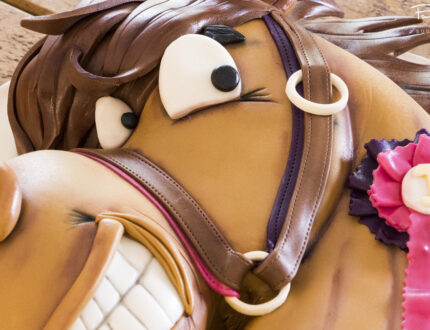
The eyes are created in a sort of 2D cartoon style so both of them are visible on the head, this is achieved using white sugarpaste for the eye and a small piece of black sugarpaste for the pupil of the eye. The ears are created using the teddy bear brown sugarpaste combined with a smaller amount of pink sugarpaste (for the front ear), use spaghetti to hold the ears in place and add detail using the PME tools.
Tip: Try to make these as cartoon like as possible.
7. Straps
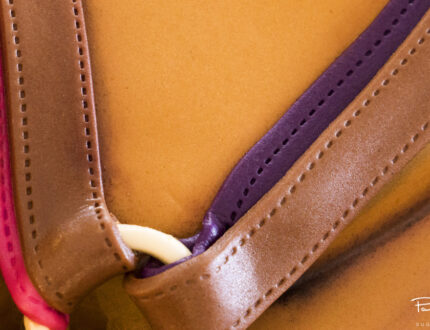
Two rings of flower paste are cut out (3 cm diameter outside and just over 2 cm inside) these can be left to dry for use later. The straps on the horses head will be created using brown sugarpaste, roll out enough to go over the nose and up to the top right of the head. Three 1.5 cm strips are cut in the brown colour along with two purple 1.5 cm strips and one pink 1.5 cm strip, these are finished off with the stitching tool for a realistic strap effect. Follow Paul’s guidance to place the straps onto the cake and to attach the flower paste rings made earlier.
Tip: You can add more details to the straps if you wish.
8. Dusting
Dusting the cake adds depth with a two-toned effect, darker tones are added to detailed parts of the cake and adding these around the straps, mouth and nostrils looks great too!
Tip: Don’t be afraid to mix different tones to achieve more depth.
9. Rosette
Before we make the rosette it’s time to transfer the cake over to an iced cake board, it’s advisable to find an assistant for this part so you will spot our cameraman David make an appearance to lend a helping hand.
The Rosette is created using sugarpaste, start with coloured strips which will be later pleated and add a frilled edge for effect. Pleat the pieces by hand and turn into a circular shape, repeat this process with a smaller length of sugarpaste to create the middle layer of the rosette and top this off with a circular piece and some sugarpaste ribbons.
10. Finishing Touches
We hope you have enjoyed this course, if you’ve made your own horse cake following these instructions, share it with us on our facebook page here.
11. Other Ideas
Horse lovers will love this super fun and cartoony Horse Cake Decorating Tutorial on CakeFlix. Aimed at beginner to intermediate cake decorators, the Horse Cake Decorating Tutorial is perfect to learn some new skills and only requires a relatively small amount of time to make.
Cake Decorating: Crafting a Horse Head
-
Prepare the Cake:
- Bake a round cake and level the top.
- Trim the cake to create a basic horse head shape.
- Cover the cake with a thin layer of icing to create a crumb coat and chill.
-
Create the Muzzle:
- Roll out some white fondant and cut a rectangle shape.
- Drape the fondant over the front of the cake and smooth it out.
- Pinch the fondant together to create the nostrils.
- Use a small paintbrush to add definition to the nostrils.
-
Add the Eyes:
- Roll out two small balls of black fondant.
- Attach the balls to the front of the cake for the eyes.
- Use a toothpick to create a small indent in each eye.
- Fill the indent with a tiny bit of white fondant to create the sparkle.
-
Shape the Ears:
- Roll out two long, thin pieces of brown fondant.
- Wrap the fondant around a skewer or toothpick to create the ears.
- Attach the ears to the sides of the cake.
- Use a toothpick to add definition to the ears.
-
Add the Mane and Tail:
- Roll out a long, thin piece of black fondant for the mane.
- Attach the mane to the top of the cake and smooth it out.
- Use a fork to create a wavy texture in the mane.
- Roll out a smaller piece of black fondant for the tail.
- Attach the tail to the back of the cake and smooth it out.
- Use a fork to create a wavy texture in the tail.
-
Add the Details:
- Use a toothpick to add small details to the horse’s face, such as the mouth and whiskers.
- Use a paintbrush to add highlights and shadows to the horse’s face.
- Add any other desired decorations, such as flowers or ribbons.
Don’t forget to share your interpretations of this wonderful cake with Paul and the rest of the CakeFlix Family on our Facebook group.
View hundreds of more world-class tutorials only at www.cakeflix.com.
