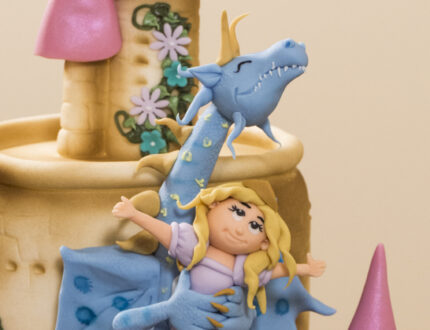
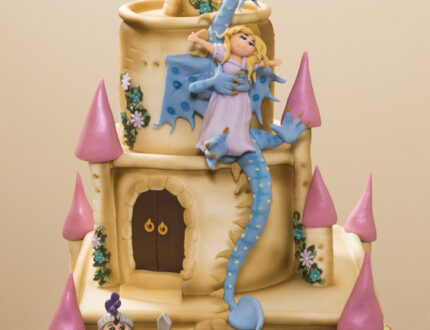
How to make a castle cake by Emma Ball Cake Decorating and Baking Tutorial

Tutorial Preview

Join NOW to access 1722 courses Watch Now
7 Day FREE Trial
How to make a castle cake by Emma Ball
with Emma Ball
Skill level: Advanced Cake Decorating | CakeFlix - Skill Level Courses
HD Lessons: 24
Decorating time: Two Half Days (allowing for drying time)
Now Playing
26:41

1. Castle Detail

The cake is started off with a 3 tier stack of 12″ Square cake, 10″ Round cake and 6″ Round cake. The cakes are iced white using the usual method you can find on the site (for help see here) and a brick effect is added using an impression mat.

Emma kicks things off by adding sausage shaped trim pieces to the edges of each tier and follows this up with turrets and door areas.

Now Playing
09:41

2. Castle Detail (Continued)

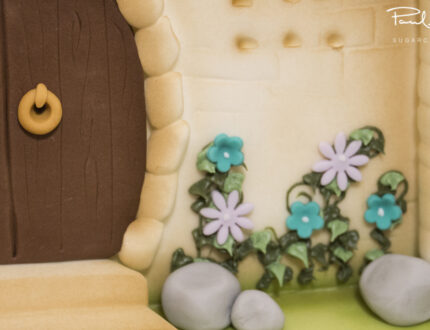
Use light brown icing to create the door knobs for each of the two doors that have been created. A stone work door frame can be built up using square pieces of white sugarpaste and attached around the door using water or a sugar glue.
Now Playing
04:35

3. Painting the Castle

Dust that airbrush off and get ready to give the entire cake a light coating of brown edible paint. Remember to do a test spray before spraying the actual cake. The coat of paint only needs to be light so keep a steady slow movement with the airbrush.
Now Playing
02:37

4. Painting the Castle (Continued)

The transformation following the previous airbrush coating is fantastic and the cake already looks totally different. Next we use a matt green colour to spray on the cake board area of the cake, use some kitchen towel as a mask to keep the green away from the cake itself.
Now Playing
02:48

5. The Turrets

Grab a large amount of pink sugarpaste and roll this into a ball, then create a carrot shape as shown to make a pointed top – the bottom can then be cut off and you’ve got a perfect castle turret! Attach this to the cake and then repeat until all your turrets are in place.
Now Playing
05:31

6. The Flowers

Dark green and light green icing is used to create ivy using this great technique from Emma. Start with the dark green icing in a piping bag and pipe small swirls as shown. Follow this up with a mixture of lighter and darker coloured green icing and the method demonstrated by Emma to create the Ivy leaves creeping up the castle walls.
Now Playing
07:51

7. Flowers and Stones

Lilac and turquoise icing is used with a blossom plunger and daisy plunger to make some neat flowers to attach on top of the Ivy. Stones are created too using grey sugarpaste rolled into random small shapes.
Now Playing
09:40

8. Making the Structure

Emma uses parafilm wrapped around the wire, this keeps everything food safe, waterproof and Emma opts to use this for any wire frame sections on her cake designs.

Sketches are used to aid with the wire frame ‘skeleton’ of the character, Google image search is also be your friend here if you’re not comfortable with drawing your characters from scratch.

TIP: 16 and 18 gauge wire is used to create the structure for the characters.

Now Playing
08:57

9. Dragon Structure

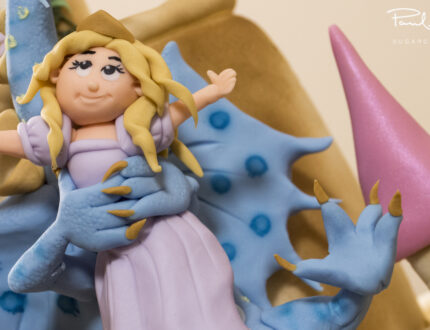
The dragon structure can be created using the same technique as the previous lesson, the Dragon is holding the Princess too which does make things a little trickier but follow along with Emma’s wire bending tips and you should find everything falls into place nicely.
Now Playing
15:01

10. Making the Dragon

With the frames attached you can now start by creating the basic dragon modelling. A goose-bump impression mat is used which gives a lizard like texture to the dragon. Build from the structural mid-section part of the dragon and work from there, blend the different pieces in together using your fingers to form a seamless model.
Now Playing
08:30

11. Making the Dragon (Continued)

At this stage you should have two wings on your dragon a tail, neck and torso. Continue pinching your sugarpaste around the wiring to create the arms of the dragon. The head and mouth of the dragon can then be created and you can see this dragon design coming to life! (If you’re literally seeing the creature come to life then you may need a bit of a rest, take a break!)
Now Playing
15:43

12. The Princess

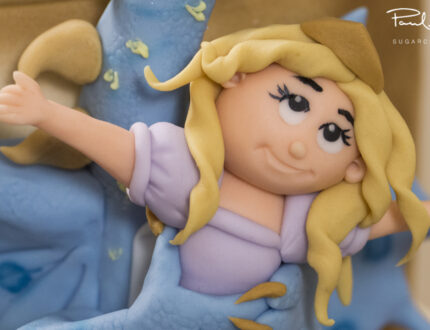
The princess model is started off with the creation of her dress in lilac coloured sugarpaste, follow the same techniques as the creation of the dragon for this section. Emma also shows you a great technique to make great hands for the sugarpaste Princess.
Now Playing
05:47

13. The Princess (Continued)

Now that the Princess is fixed in place the fingers / claws of the dragon can be added as these are clutching on to the Princess (don’t worry it’s a friendly Dragon) The claws are created once you’re happy with the location of the fingers.
Now Playing
09:47

14. The Knight

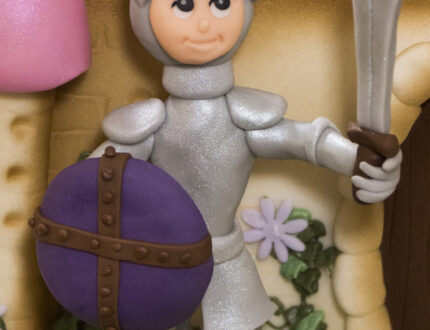
The Knight in shining armour is our third and final character for this cake, watch and learn as Emma demonstrates how to build this hero from scratch!
Now Playing
06:04

15. Shield and Sword

What kind of a Knight goes against a Dragon without a sword and shield? Use grey sugarpaste and cut out your sword blade shape, the hilt of the blade can be added once the blade is in place.
Now Playing
05:41

16. Knight's Face

Take a piece of grey sugarpaste that will be used for the Knight’s head. A skin colour circle is added to this to represent the face and then the helmet is built around this shape. Facial details are added to the Knight in this lesson too.
Now Playing
03:30

17. Painting

Use a super fine (00 size) brush to paint the eyes and eyelash details on to the Princess, the Knight and the Dragon. Don’t rush this part!
Now Playing
05:00

18. The Hair

The princess is a tad on the bald side so apply water to the head ready to stick some hair on. A tiny quiff of hair is added to the Knight using brown sugarpaste ‘carrot’ shapes. The hair for the princess is created by twisting strands of sugarpaste to form a hair style of your liking.
Now Playing
04:09

19. Airbrushing - Part 1

Enhance your cake with some final airbrush work, Emma sprays highlights on the Dragon with a peacock blue colour.
Now Playing
01:08

20. Airbrushing - Part 2

Enhance your cake with some final airbrush work, Emma sprays highlights on the Knight’s Armour with a Pearl colour.
Now Playing
01:22

21. Airbrushing - Part 3

Enhance your cake with some final airbrush work, Emma sprays highlights on the turrets of the Castle with an iridescent paint.
Now Playing
03:56

22. Finishing Touches

Almost there! The final finishing touches of the cake include a feather on the Knights helmet, teeth on the Dragon and some extra detail on the dragon’s scales.
Now Playing
01:29

23. Other Ideas

Paul Bradford joins Emma to talk about other ideas that can be used when creating this cake.
Now Playing
01:55

24. Pro Lesson

Emma Ball and Paul Bradford team up to give Pro advice regarding the pricing and other aspects of this cake.

Learn how to make a Dragon Castle Cake with Emma Ball on CakeFlix with this step by step video tutorial. Emma will guide you through all of the stages of how to transform a three-tier cake into her magical Dragon Castle cake design.

This Dragon Castle Cake Tutorial | CakeFlix is aimed at cake decorators that have an advanced skill level due to the modelling skills involved, but don’t be afraid to take a look and learn with us if you’re not quite at an advanced level as Emma is a great teacher and you’re sure to learn lots. Throughout this course you will learn numerous new skills and techniques that you can apply to other cakes. The course also contains lessons on how to make an incredible dragon sugar model, princess sugar model and our hero – the knight sugar model.

Dragon Castle Cake Tutorial | CakeFlix

A dragon cake background is a popular choice for birthday parties and other special occasions. It can be created using a variety of techniques, including:

  • Fondant:

    Fondant is a sugar-based paste that can be used to create a variety of shapes and decorations. To create a dragon cake background, you can roll out the fondant and cut out dragon shapes, or you can use a mold to create more detailed dragons.

  • Gum paste:

    Gum paste is a similar sugar-based paste to fondant, but it is more elastic. This makes it ideal for creating 3D decorations, such as dragon wings and tails.

  • Royal icing:

    Royal icing is a mixture of sugar, egg whites, and water. It can be used to create a smooth, hard surface, or it can be piped to create intricate designs.

  • Airbrushing:

    Airbrushing is a technique that uses a spray gun to apply a fine mist of color to a cake. This can be used to create a variety of effects, including a dragon cake background.

When creating a dragon cake background, it is important to use colors that are appropriate for a dragon. Common colors include green, red, gold, and silver. You can also use a variety of techniques to create a realistic dragon background, such as adding scales, wings, and claws.

Don’t forget to share your interpretations of this wonderful cake with Paul and the rest of the CakeFlix Family on our Facebook group.

View hundreds of more world-class tutorials only at www.cakeflix.com.
Emma Ball

Emma Ball

Emma started as a Saturday girl at the very famous Richard's Cakes and in true rags to riches fashion Emma is now the manager of Richards' Cakes where they produce an average of 70 cakes per week! Richards' Cakes have catered for a number of celebrity clients - including Andrew Flintoff and the cast of Coronation Street. Emma has also went on to win countless Gold Awards at Cake International too!
* indicates a required field
7 Day Free trial