The Beatles Cake Decorating and Baking Tutorial

Tutorial Preview

Join NOW to access 1711 courses Watch Now
7 Day FREE Trial
The Beatles
with Paul Bradford
Skill level: Advanced Cake Decorating | CakeFlix - Skill Level Courses
HD Lessons: 32
Decorating time: 2 Days
Now Playing
06:14

1. The Design

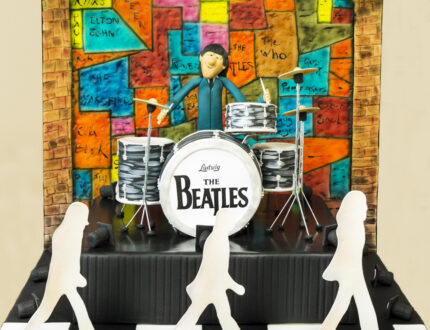
Paul talks about the reasons for creating this cake and teaches you how to construct the background sections which set the stage (no pun intended) for the cake itself.

Tip: If you’re looking to make a simpler design that cake will work well without the background sections too.


Now Playing
09:07

2. Decorating the Background

The background section is covered using white sugarpaste and any excess is trimmed off.

A texture mat is used on the sugarpaste to produce the wall like texture that we’re after for this design.

Tip: You could also use a wooden structure for the frame.

Now Playing
12:42

3. Icing the Board

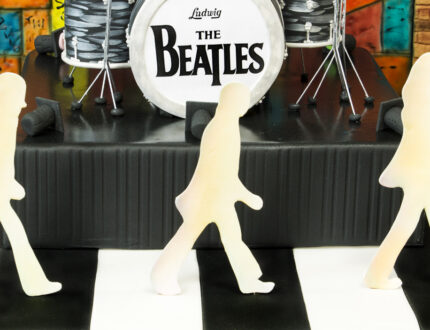
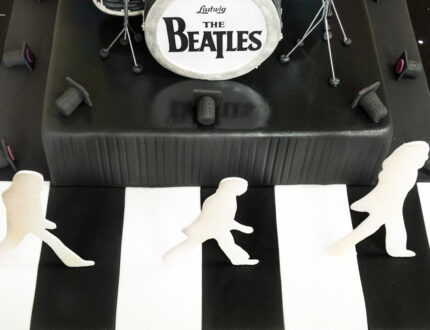
Starting with some measurements of where the cake will fit Paul shows you how to ice the board in a zebra crossing style to represent a very famous album cover.
Now Playing
07:19

4. Icing the Cake

Paul uses a dummy cake in this lesson, of course if you’re using a real cake – which we’d expect you are, you can learn to cover a square cake in this lesson.
Now Playing
07:27

5. Painting the Background - Part 1

Paul now creates a brick effect to the background panel, some careful measuring and a steady hand will help you out here – Just follow Paul’s lead on this one.
Now Playing
07:13

6. Painting the Background - Part 2

Once you’re happy with your brick outlines you can begin to paint the brick sections using the airbrush and different colours.
Now Playing
02:09

7. Painting the Background - Part 3

A black colour is now used to add shadowing using the airbrush around the brick edges. Keep a steady hand a take your time with this.
Now Playing
02:07

8. Painting the Background - Part 4

Paul makes the colours darker by giving the wall panel an all over spray from a distance using the black colour. This adds contrast to the cake and helps set the Cavern mood.

Tip: You can use an small brush for the black sides of the wall if you don’t want to take any risks with the airbrush.

Now Playing
08:21

9. Finishing the Wall

Paul uses an FMM Tree Brick Impression mat to add a nice brick effect to sugarpaste, this will then be attached around the sides of the background to surround the coloured mural wall.

Tip:Place something behind the wall to strengthen when applying the sugarpaste, you don’t want to break it!

Now Playing
03:16

10. Painting the Wall

Paul now applies a dusting of colour to individual areas of brick that we added previously. We use Milk Chocolate Dust, Chocolate, Rust and Black colours of dust which give great brick colours that really suit this cake.
Now Playing
01:40

11. Painting the Wall (Continued)

Paul continues the painting of the wall with a dark shade of dust to add to the oldie look of the brick.
Now Playing
04:33

12. Painting the Names

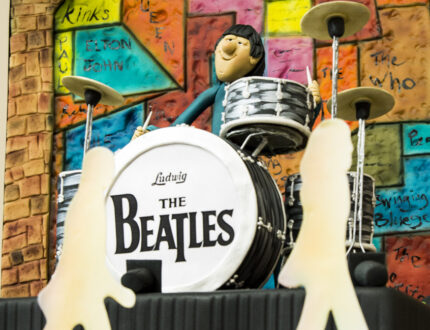
Paul paints the names of famous bands similar to the mural wall found in the Cavern Club. A web search of ‘The Cavern Club main stage mural’ should help you out here.

Here’s a list of the names Paul uses:

1. The Beatles
2. Ringo Starr
3. The Rolling Stones
4. The Yardbirds
5. The Kinks
6. Elton John
7. Queen
8. The Who
9. John Lee Hooker
10. Cilla Black
11. Focus
12. Adele
13. Jessie J
14. Travis
15. Oasis
16. Arctic Monkeys
17. Jake Bugg
18. Undertakers
19. Hello Felix
20. The Seftons
21. Ravens
22. Gerry and Pacemakers
23. Rubber Soul
24. Hurricanes

Tip: A food pen can be used but wait 12 hours to ensure the wall is dry beforehand.

Now Playing
09:10

13. Lights

Have your DIY skills at the ready as we’re going to add a couple of drilled holes to the background board of the cake to pass some 18 gauge wire through to attach the stage lights. The main lights are created using a small pot (Paul uses a lustre dust pot) with sugarpaste attached. Smaller stage lights can be created using just sugarpaste.
Now Playing
10:23

14. Lights (Continued)

Detail is added to the lights you made previously, we add a grey textured sugarpaste to the black lights which makes the lights stand out better on the cake.
Now Playing
05:18

15. Placing the Cake

We’ve now set the scene for the cake nicely and it’s now the perfect time to transfer the cake to it’s new home. Remember Paul is using a dummy cake so that’s why he’s using the glue gun, for a real cake use ganache to hold the cake in place and a palette knife to help release the cake ready for the transfer.
Now Playing
09:32

16. The Drums

We use Rice Crispy treats as the base for the drums, use circular cutters to cut out the drums in various sizes and ganache as shown with a cake card under each drum. Refrigerate the ganached drums after this until the ganache has firmed.
Now Playing
01:50

17. The Drums (Continued)

Use a small palette knife and some warm water to smooth off the ganache, follow this with a pastry brush and warm water to neaten things off nicely.
Now Playing
04:46

18. Icing the Drums - Part 1

Paul shows you how to cover the drums with icing, starting with the drum skins and continuing on to the black outside of the drums. Do these one at a time, this allows you to keep the ones you’re not working on in the fridge to keep them cool and easy to work with.
Now Playing
05:30

19. Icing the Drums - Part 2

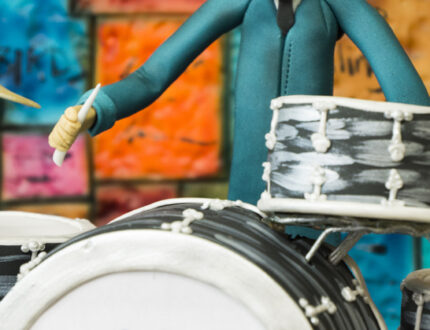
With all four drums iced, light edible silver paint is used (mixed with water or a small amount of alcohol to thin down) to add the funky design to the drums.
Now Playing
10:11

20. Icing the Drums - Part 3

The drum kit is finished off with the addition of the rim of the drums and extra details. Piped royal icing (using a number 2 nozzle) is used to add the extra detail to each drum.
Now Playing
10:12

21. Icing the Drums - Part 4

The details that were piped on and added previously are now painted silver to add authentic look to the drums. Use edible paper / ink and print the drum skin with the bands logo. Alternatively you can hand paint the drum.
Now Playing
10:24

22. The Stands - Part 1

Try to leave it a day or two for the drum components to dry fully. We then assemble the drum kit using a wooden stick through the bass drum (larger drum). The other drums / cymbals on the drum kit will be attached using florist wire.
Now Playing
08:35

23. The Stands - Part 2

After battling with the structure of the drums, Paul decides to go non-edible with the drum kit due to the risks involved with using metals and glues along side edible sections.
Now Playing
17:18

24. The Stands - Part 3

A slightly more craft related section than usual, Paul creates stands for the floor standing drums and attaches the cymbals after painting them with a gold dust.
Now Playing
07:21

25. The Lights

Scraps of coloured sugarpaste come in handy here as we create the coloured stage lights that shine down on our fab four!
Now Playing
24:14

26. The Drummer

Florist wire is used to create the framework of our drummer (let’s name him Ringo!) sugarpaste can then be used to cover the wire and create a realistic character model.
Now Playing
13:00

27. The Drummer (Continued)

The drummers head and hair is created entirely from sugarpaste with the help of some PME tools. Modelling chocolate can also be used for this section if preferred.
Now Playing
13:00

28. Silhouettes

Use the templates (linked above) to print the silhouettes of the other band members, these can then be used as guides to create your 2D silhouettes which look brilliant crossing a very famous London road.
Now Playing
05:35

29. Airbrushing

Fire up the airbrush and use edible paints to add shading to the silhouettes as shown.
Now Playing
05:27

30. Finishing Touches

The all important finishing touches are added to the cake, holes are also drilled to attach the silhouettes so they stand firm and secure in place on the crossing.
Now Playing
03:57

31. Other Ideas

Paul shares some other ideas for this cake and different methods you could use when creating this cake. We’re certain the drum kit and drummer would be very popular as a standalone cake topper.
Now Playing
03:35

32. Pro Lesson

Paul talks Pro in this lesson and covers subjects like pricing and the time it’s realistically going to take to make this cake.
The fab four pay a visit to our cake decorating course library in the shape of this Beatles Cake tutorial. A huge Beatles cake course with tons of techniques to learn and an end result that will have you transported to the Beatles early days playing at the Cavern club in Liverpool, right before tucking in to some tasty cake!

Learn to make The Beatles cake with Paul Bradford and don’t forget to share your results on our Facebook Page.
Paul Bradford

Paul Bradford

Paul Bradford´s mission is to ‘Empower people to achieve their cake decorating dreams’ by providing a range of cake decorating courses and online tutorials through their website, which currently teaches 195,000+ students.  
* indicates a required field
7 Day Free trial