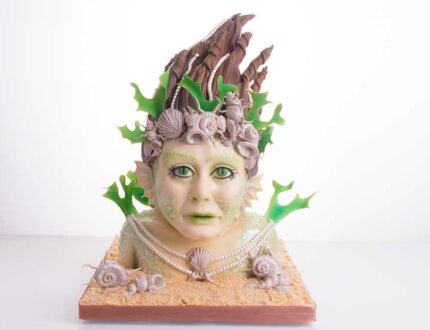
Tutorial Preview
Highlights
Highlights of the mermaid cake sculpture course.
1. Making the stand
Rhianydd explains how she made the stand first of all, along with some useful hints and tips for you to make yours. She provides detailed measurements and ensures that everything is completely foodsafe. Check out the Tools, Ingredients and Templates tabs below for details on what you need.
NOTE: The rod was cut short (15”) due to an earlier mark, which resulted in a shorter neck. Always check your measurements!
2. Carving the bust
This lesson is full of hints and tips on how to get a proportional bust ensuring the shoulders are balanced. Making sure the cake is shaped correctly when meeting the neck is very important and Rhianydd explains and shows this very well.
3. Carving the head and covering in ganache
It shows even the experts can make mistakes, but watch how Rhianydd recovers when she realises that she hadn’t put the layers for the head on in the right order. After sorting it out like a Pro, she then adds a layer of ganache before popping into the fridge to set.
4. Starting the facial features
Rhianydd uses white chocolate ganache and anatomical measurements to get accurate facial features. Her explanations are very clear and precise, but she does have a handy prop to help out!
5. Moulding the facial features
This is where cake artist turns sculptor. However, it’s not as daunting as it may first seem as Rhianydd layers up the features clearly describing each layer as the face starts to develop. The big tip here is to have a 3D model to help with your alignment and placing of the features.
6. Adding the collarbone
Time to add the collarbone, so again it’s just the placing and shaping of more of the delicious white chocolate ganache.
7. Adding the hair and spine
Rhianydd then added the spine before starting on the hair. The hair can be tricky, but watch how she shapes the rice krispie treats then adds to the head before covering in a layer of ganache.
8. Making the shells
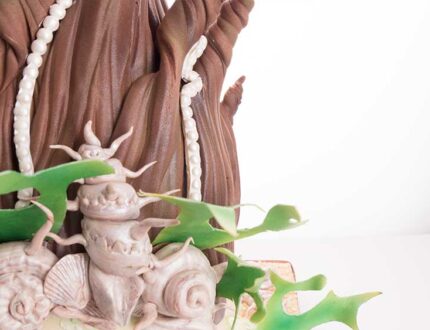
While the Mermaid chills out in the fridge Rhianydd, makes a selection of sea shells. There are some made using a mould and others hand made, but all with a marble effect paste to great effect.
9. Making the seaweed and scales
The Mermaid is still in the fridge so there’s time to get on with some more decorations. In this lesson, Rhianydd shows how to make some lovely coloured seaweed that curls just like the real thing.
10. Covering the bust
Time to get covering the cake. Rhianydd starts with the body and shows how to roll, cut and mould the paste to the body. Lots of little hints and tips along the way.
11. Covering the face
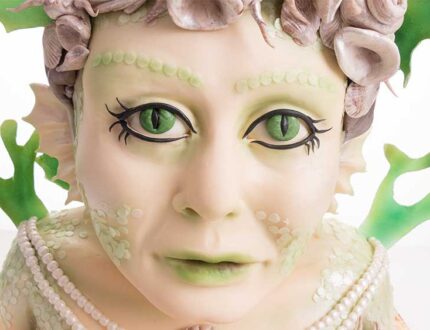
This is the tricky part so if you are doing it for the first time you might want to find a helper to assist. Rhianydd has done this many times before so talks you through the stages and shows how to get neat coverage and showing all those important facial features.
12. Adding the eyeballs and shaping the nose
Time to get the eyes onto our Mermaid, which is all straightforward enough. However, the nose takes a little more time. Rhianydd shows a lot of great hints and tips to shape the nose, again, with a keen eye on being anatomically correct.
13. Adding detail to the mouth and eyes
The detail just keeps coming as the face starts to take its distinctive shape with extra details being added to the mouth and eyes.
14. Adding the hair
Our Mermaid now starts to get her distinctive full head of hair. It’s just a case of getting the underlayer at this stage, texturising then adding to the head.
15. Adding the gills and ears
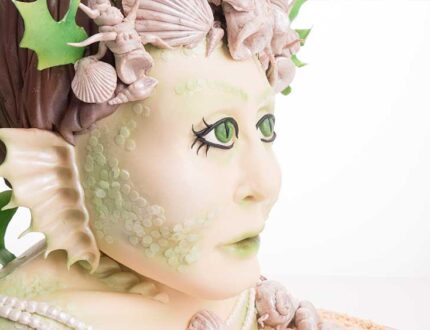
Now we start to add the sealike features with the gills and Mermaid style ears. It’s a case of rolling and shaping the desired shapes. Although Rhianydd just adds one of each to camera, you are better to add the pairs of gills and ears at the same time to ensure you get the sizes the same.
16. Adding the scales and colouring the eyes
Rhianydd shows a couple of ways to add the scales so it’s really down to which you prefer. But it’s the eyes that really grab the attention. Using striking colours and techniques the eyes come together and are really quite stunning. This is definitely one to watch!
17. Airbrushing the Mermaid
Time to really bring our Mermaid to life with the airbrush. It’s a case of patiently building up the layers of colours to get the finish you want and always remember that it’s easier to add than to remove so be patient!
18. Adding pearls and finishing touches
Now that our Mermaid has come to life, we can finally decorate the piece with the pearls along with the shells and seaweed we made earlier. With some careful placing and a little tinkering we end up with our splendid finished cake.
19. Other ideas
Rhianydd shares some other ideas for what you could create with a design like this.
20. Pro lesson
Everything a professional cake decorator needs to know about pricing and selling this cake.
Mermaid Cake Sculpture…
Learn how to make this fantastic mermaid cake sculpture with the incredible Rhianydd Webb. A simply mesmerising design, it’s time to take your cake decorating to new depths!
In this tutorial you will learn how to:
- Make an internal structure
- Intricately sculpt
- Create freehand seashells
- Airbrush and paint contrasting colours
- and much, much more
About Rhianydd Webb
Rhianydd is an award-winning cake decorator from Wales. She owns the highly regarded Dragons and Daffodils and is most noteworthy for her novelty cakes, wedding cakes and as you can probably tell… sculptures!
Don’t forget to share your interpretations of this wonderful cake with Paul and the rest of the CakeFlix community on our Facebook group.
View hundreds of more world-class tutorials only at www.cakeflix.com.
Rhianydd Webb
Rhianydd Webb set up Dragons and Daffodils Cakes in July 1999. A home-based business with the lovely Pantygraigwen Community Centre for classes, based near Pontypridd in Wales.
Rhianydd started off by learning her trade through books, which were her only source of knowledge and inspiration. Amongst the key artists that she learned from are Alan Dunn, Tombi Peck, The International Sugarcraft Books, Debbie Brown, Lindy Smith to name just a few. Since then, I have been very lucky to be able to study Intermediate Cake Decoration and Beginners sugar flowers under the very talented Janet Side and received Distinction for both. I have also attended day courses with Alan Dunn, John Costello, Carlos Lischetti, Mary Presicci and Kim Wiltjer.
