Tutorial Preview
1. Carving & Ganache
Paul then shows you how to get that neat finish with the ganache that’s critical if you want to get the icing nice and smooth also.
2. Covering and Trim
Once broken down into short easy to follow stages you will see how to cover the cake and where to allow the joins. The trim on the bag allows you to cover the join and at the same time start to add the decoration to the bag.
3. Decorations
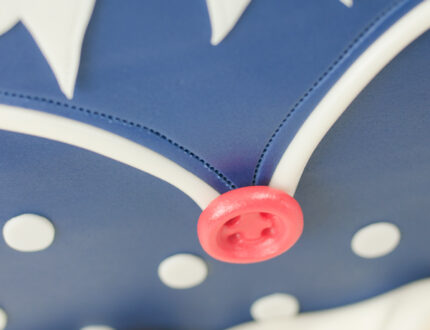
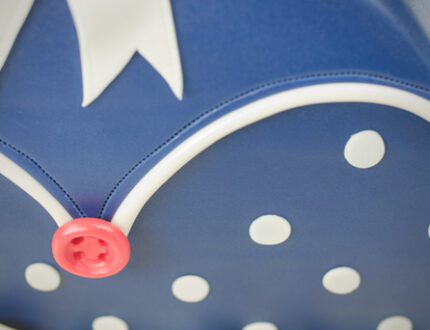
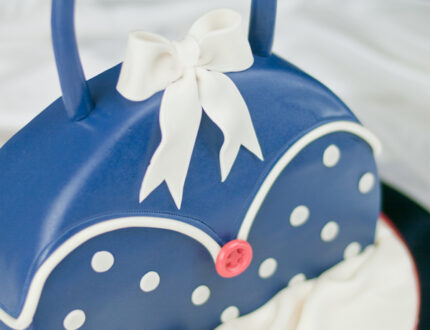
Adding the bow and button bring the cake to life and the polka dots given it that distinctive look.
4. Handle
What handbag is complete without a handle?…. Oh a clutch bag… Well this isn’t one of those! In this lesson Paul shows you how to do the handle and its not that hard really!
5. Finishing Touches
Well your almost done! Did you have fun? Let us know in the comments if you enjoyed it and don’t forget so show us your pictures on our Facebook page too! In this last lesson Paul talks you through those all important finishing touches.
This cake is rated Easy so no excuses there! It also takes around 2 hours to decorate.
Don’t forget to share your interpretations of this wonderful cake with Paul and the rest of the CakeFlix Family on our Facebook group.
View hundreds of more world-class tutorials only at www.cakeflix.com.
Click here for printable tools and ingredients list
other US to metric and Metric to US
- 10″ Round cake
- 12″ Round cake drum
- 6″ Round cake card or drum
- 600g Ganache
- 1.25Kg Navy sugarpaste (or your preferred colour)
- 1Kg Ivory sugarpaste
- 10g Red sugarpaste
- 20 gauge white wires (x2)
- 1m Red polka dot 15mm thick ribbon (or colour of your choice)
- florist tape
- PME Lustre glaze
- Micro posy picks x2
- Sprinkle of icing sugar
- Pallet knife
- Smoothers
- Pritt Stick
- Rolling pin (large and small)
- Serrated knife
- Sharp knife
- Scraper
- PME Stitchy tool
- Ruler
- Pastry brush
- PME Ball tool
- Round cutter 1cm


Great work. And Great tutorial . Paul Bradford a blessing for cake decorator beginner around the globe . Keep it up ‘
Amazing what one can achieve with loads of patience, well done Paul & thanks.
Warm regards.
Patricia.
It was great
Great tutorial thanks so much
que lindo quedo el bolso, muchisimas gracias por compartir sus conocientos.
Google Translate: stay cute bag, thank you very much for sharing your conocientos.
No problem glad you enjoyed it!
Excellent!! Thanks for sharing!
Great glad you enjoyed it! 🙂
Thanks so much for sharing your knowledge. I have a question please tell me what is the brand of the spray that he used last to shine the fondant. Where in in the USA
I could buy it?
Love learning from Paul.
mary
Hi Mary0007, try searching google for ‘pme spray glaze’ and you should find what you’re looking for x
Absolutely loved this tutorial. Thank you.
Thanks Rosanna, glad you enjoyed it x
Thanks so much for this tutorial. You inspire me to keep learning and practicing.
Thanks for commenting Sandie, hope you consider joining our premium membership in the future to access hundreds more of our courses! x
absolutely brilliant tutorial.thank you so much.x
thank you so much i have just signed up and think this is absolutely brilliant i like making cakes but am only a beginner and this is a great help thank you for all your hard work christine.
Thanks Christine, hope we teach you lots of new tricks and skills! x
Could you please tell me what the name of the spray you used to make the bag shiny at the end?
Hi alyssasanele, the spray used is a PME Edible Clear Glaze spray x
Thank you so much, I have just made the handbag cake for my sister and it is fab, I will defo be signing up very soon, Paul is so easy to follow, I am making cupcakes and some celebration cakes but its just a hobby which seems to be growing….
That’s fantastic Carol, glad the Handbag cake course was an inspiration to you and look forward to seeing you as a member at the school – if you need any assistance or have any questions let me know on [email protected]
Wonderful tutorial, thanks God bless u. Thanks so much for sharing
A-Mazing, will definitely be giving this a go…such easy to follow instructions!
Glad you like the course Emma, hope the cake goes well! x
Thanks Paul you gave me some great ideas & tips & in return I got great reviews on the handbag cake I made for my daughters 15 birthday your an inspiration keep it going.
Great to hear it and glad we helped you out! x
Loved it can’t wait to have a go.
Hope it goes well! (we’re sure it will)
fantastic tutorial. for beginners like me the step by step videos are soooo helpful. Going to practice this cake for my Granddaughters 21st handbags are her passion
Thank You
Hope the handbag cake went well Colleen! x
Oh! how wonderful the finished item. excellent tutoring. I just signed up but love the first video. Thank you Paul.
Hi Scrumpet!
We are so glad you enjoyed the tutorial! Send us a picture of your cake if you have one – we love to see them! 🙂 x
What was the item used to sturdy the handles? It looked like a tube.
Hi Lucinda,
To sturdy the handles, wire can be used so that it can be bent into position.
I hope this helps!
Cheers D xx
great tutorial .Paul Bradford a blessing for cake decorator around the globe.
Hi Floraline,
Thank you very much ! We are so glad you are enjoying the tutorials:) x
Thank you , I’ m learning so much. I’ m from Madagascar and we don ‘ t havé sugarcraft school here so thèse tutotrials are big chance for me. Tanks again.
Hi Lanto,
We are glad to have been able to help you! Wr hope you continue to enjoy the courses!
D xx
Thank you very much. indeed your a great teacher. Am blessed.
Thank you Mary Tonnie! We are glad this course was able to help you! We hope you continue to enjoy the courses 🙂 D xx
this was great got my daughters 30th coming up and this cake will be perfect for it was great to be able to watch being made rather then trying to follow out of books i have thankyou
Hi Mary,
Thank you for the great feedback – I agree I find watching a tutorial a lot easier to follow than reading it from a book! I am very glad it has come in handy for you! Enjoy making the cake for your daughter:) Kind Regards, Danielle x
fantastic video.help me alot . thank u PAUL.
Hi Asmatoqir01,
Thank you for getting in touch and we are so glad that you enjoyed the tutorial! x
I love it!!!! thankyou sooo much!!! Great tutorial
No problem! I am glad you enjoyed the tutorial! x
Brilliant!! I a sooooo gonna make this! Thankyou for the step by step tutorial. You rock!
Hi CarolannW, thank you for the feedback! I am very glad that you are enjoying the tutorials! Enjoy making the bag:) D xx
Dis is amazingggg! Great job.well done Paul
Thank you very much Buckky1976. I hope you enjoy the other courses:) D xx
love love love your tutorials, thank you for sharing. Just starting out as a hobby & can’t wait to try this
Hi Jackie72! Thank you for joining the site and for watching this tutorial 🙂 I am glad you found it useful! I hope you enjoy many of our other tutorials! Please post your cakes to our facebook page – https://www.facebook.com/PaulBradfordSugarcraftSchool
Great job!!! I LOVE it .
Hi Sonia,
Thank you for the feedback:) I am glad you enjoyed this tutorial:) D xx
whaooo am glad i came across this site…thank you so much. i wanna ask, what type of spray do you use? is it like oil? thank you
Hi Adeshola,
Thank you for the lovely feedback. I am so glad that you are enjoying the site. It is PME make clear spray glaze. If you search online you should be able to find it!
Thanks D xx
whao am so happy for coming across your school,thanks so much for sharing your knowledge with us .please i would like to know the make up for sugar paste because my sugar paste used to crack and i dont enjoy working with fondant.please kindly put me through.
Hi there, thank you for getting in touch. Sugarpaste and Fondant are the same things, just different names. It may be the type of sugarpaste you are using which is causing it to crack. Try different brands of sugarpaste and see what works best for you. You can also add a little trex to the fondant to stop it from drying out and cracking. You can read more about it here – http://www.designer-cakes.com/questions/trex-in-sugarpaste-before-rolling-out-to-cover-a-cake/
I hope this helps! x
great i loved this tutorial, one question would it not be easier to cover cake in one piece rather then applying in separate piece, or does it make a difference to how cake would look?
Hi AnnieMc
I am so glad you enjoyed this tutorial! No Paul believe’s it easier, and you get a smoother finish if you cover it separately. I hope you enjoyed the tutorial and gave it a go yourself! x
Hi love the. Video love making cake and decorating always wanted to know how to do a handbag can’t wait to try it out
Hi Sonia,
Thank you for the awesome feedback:) I hope you enjoy making the cake as much as I enjoyed doing it:) x
Its brilliant, carnt wait to try it. Thank you Paul, a great tutorial.
Hi Thomas, thank you for getting in touch and for your awesome feedback! Best of luck with your cake! Post photographs of it to our facebook page if you get the chance – we would love to see it! https://www.facebook.com/PaulBradfordSugarcraftSchool
Thanks for this great work, am sure going to try this for my upcoming 30th birthday in April. Am glad I found your site, thank you
Hi Tinuks12, thank you for the awesome feedback. I hope you continue to enjoy the courses:) Dxx
Buen trabajo…good job
Thank you Juanjo77! We appreciate your feedback:) x
Thank you for all generosity on the part of you !!! ameiiiiiiiiiiiiiii
No problem Marcela! I am so glad you enjoyed the tutorials:) Cheers, D xx
great work!!! thinking about signing up… what kind of knife is that called (the one with the orange handle)
Hi Nessa1137,
You can find a similar question and answer here – http://www.designer-cakes.com/questions/craft-knife
I hope this helps! Hopefully we can welcome you to the school very soon! If you need help with signing up at all, please contact me at [email protected] and I will be happy to help! 🙂 D xx
Hello Nessa1137
I hope you don’t mind me jumping in with an answer for you. Danielle directed you to an answer I gave ages ago on this particular knife. My answer back then wasn’t really very helpful. These little knifes are used by florists and can be purchased in the Range (if you are UK based) or in florists or floristry suppliers. The handle colour varies but they are all the same tool. Look out for them also on market stalls and in many discount/budget stores where you’ll see them as inexpensive multiple buys. Well worth stocking up on!
Thanks so much for adding this to the free content. I need to make a handbag cake for a 21st birthday and was dreading having to figure it out myself! The green boards Paul uses – where can you buy them? I’ve never seen sugarpaste stick as little as it does on there… thanks Cas x