Tutorial Preview
Highlights
Here we’ve carefully selected the key parts from the entire tutorial and condensed it into on 6 minute long video. More than enough to get you started without taking too much time.
1. Making the stencil
Paul has raced ahead and covered his cakes and you can learn just how he did that by watching the cake covering lesson. Paul explains the inspiration behind this design and then goes onto to show us how to make a stencil which we can use to airbrush long grass.
2. Airbrushing the cake
In this lesson Paul airbrushes the cakes with a nice grey tone, working to create a darker to lighter shade from the bottom tier up, which looks rather lovely. Using a turntable at this stage is recommended as it makes it so much easier to achieve an even spray.
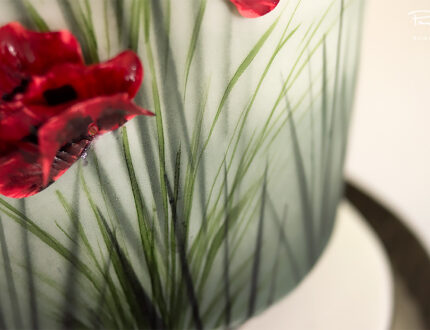
3. Airbrushing the grass pt 1
Next Paul focuses on the bottom tier and decides to cut the larger stencil in half to make it easier to work with, keeping it all intact with post-it-notes and tape. Try to build up the bottom with lots of layers and angles, with the intention of gradually thinning out the overall look toward the top tier. Oh… and use gloves and a mask!
4. Airbrushing the grass pt 2
Paul now moves onto the second tier and pays close attention to where the grass has been airbrushed on the bottom tier, so that they match up. Paul maps them out by measuring with a ruler where the strands are and marks the cake lightly so he can follow them up. Paul finds using a single strand template is easier to work with here – although more time consuming it’s certainly easier.
5. Stacking the cake
Now Paul has airbrushed all the cakes, it’s time to stack them making sure they all line up. Paul decides to use two cake cards on top of the board to give the cake a floating feel, which looks just lovely.
6. Making the poppies
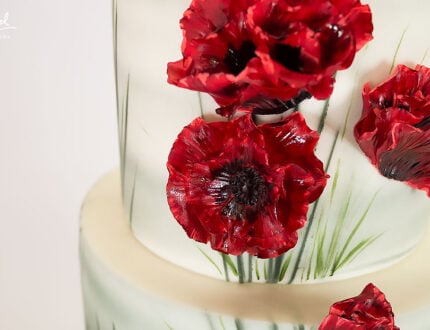
Now it’s time to make the poppies. Paul uses some red flower paste along with poppy cutters and a general leaf veiner. Paul cuts them out and then uses a small ball tool to thin out the edges, puts them in the veiner and then further thins the edges. They are then left to dry on an egg cup foam mat to dry to a nice natural shape.
7. Adding the poppies
Here Paul adds the poppies to the cake using edible glue and cocktail sticks to allow them to dry securely in position. Paul has already drawn out where he wants them to go which allows him to attach them fairly quickly and confidently. It’s always a good idea to plan these things ahead, so you can work away from the cake first.
8. Painting the poppies
Paul now goes on to paint the roses to give them more depth, and uses lovely reds and blacks to give them a dramatic look.
9. Finishing touches
Now it’s onto painting some green flashes of grass to finish off the cake which lead into the poppies. This helps brighten the cake a little and makes the poppies pop even more. It’s always good to paint a little at a time and make sure to walk away every now and again, to give yourself a fresh perspective.
10. Other ideas
Here Paul shares some other ideas you can try your hand at when making this cake. We’re sure you’ve some of your own great ideas and we’d love to see what you come up with.
Please share your pics with us on our Facebook page
11. Pro lesson
In this lesson, Paul shares some insider information about the cost to make this cake, as well as pricing, portions and other vital information for any professional cake designer.
We’d love to see your take on the Poppy Wedding Cake – so share your snaps with us on our Facebook page!


