Princess Pirate Bonny Blue Heart Cake Decorating and Baking Tutorial

Tutorial Preview

Join NOW to access 1722 courses Watch Now
7 Day FREE Trial
Princess Pirate Bonny Blue Heart
with Rhu Strand
Skill level: Advanced Cake Decorating | CakeFlix - Skill Level Courses
HD Lessons: 28
Decorating time: Two Days (with drying time)
Now Playing
19:21

1. Getting the Board and Armature Frame Ready

Struggling for time? Why not watch the entire tutorial in under 30 mins?

To start us off, Rhu shows us how to make a travel worthy stand that can withstand a tropical storm. As this model is not really meant for eating we can get away with different methods of putting it all together using things such as MDF and nuts and washers and metal wire. If DIY is not your thing, don’t worry as once you have this out of the way it will be straight on to the modelling work. If you haven’t been introduced to this modelling wire before you are in for a treat. It’s such a delight to work with – surprisingly easy to manipulate and very fairly priced as well. You definitely want to have a think about the lengths and sizes of everything, but if you are following this exact design don’t worry as these are all provided below.

Download the template here:
JPG – target=”_blank” rel=”noopener”>Princess Pirate Template 1
Now Playing
22:37

2. Lesson 2 - Making the Treasure Chest

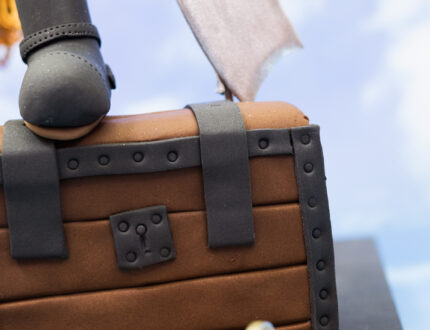
In this lesson, we will be making the treasure chest. This will not only look brilliant but will serve a very practical purpose of supporting the leg and sword of the pirate. To get the curve of the top of the chest, Rhu has found a very quick work around. To save yourself having to carve polystyrene, work with a 6” round dummy cake. Watch to see how she does this. It’s very simple and as it’s going to be covered in sugarpaste, it doesn’t need to look perfect. You will also learn a new nifty way to use a nozzle to add the finishing touches to the chest.
Now Playing
09:41

3. Shaping the Wire Body

For this lesson, have a pair of pliers handy. Although the wire is very easy to bend, you will need the pliers to get sharp edges necessary for creating limbs for the body. The aim is to try and make it as lifelike as possible, thinking about body proportions and also the way the body is positioned.
Now Playing
16:10

4. Adding the First Leg

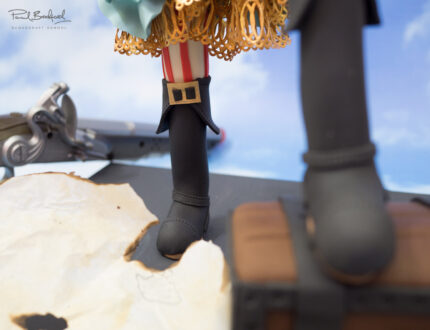
For the leg, the idea is to roll out a tapered sausage (carrot/parsnip) shape and then cut a funnel into it allowing it to wrap around the wire. It might be an idea to weigh how much sugarpaste you use so that you can replicate it as accurately as possible for the second leg. Once you have got it onto your armature wire you can use some edible glue or water and your finger to get rid of the join line. All the same principles apply for the boot and again try and keep measurements of lengths and heights for continuity.
Now Playing
17:00

5. Adding the Second Leg

In this lesson we will be using all the same techniques but obviously shaping the leg differently. Rhu shows us a very quick and easy way to add a little more detail to the boot using a craft knife, circle cutters and the stitchy tool.
Now Playing
24:47

6. Finishing the Boots and Adding Stripes to the Leggings

As Rhu states, it’s best to step back from your work every now and again making sure you are happy with what you have done. When cutting the stripes for the leggings, Rhu decides to cut them free hand to give a more realistic material appearance once they are on the leggings as material stretches as it goes around the body. Bare this in mind when attaching them to the legs and think about how the stripes would appear as they go around the thigh area and so on. Watch Rhu…she’ll keep you right.
Now Playing
12:49

7. Building the Body Up

Things are progressing quickly and now we are onto the torso. When adding sugarpaste to the torso try and remember that you will be adding on other clothing layers that quickly add shape to the body later in the tutorial. This is especially the case towards the waist area so keep that part of the body extra thin. Then it’s onto the chest area. Rhu educates us on where the chest should be built up and she advise that you look in the mirror (if you are female!) to get the form right.
Now Playing
19:32

8. Working on the Head

Once you have secured your polystyrene ball onto a wooden stick or dowel, it’s time to cover it with flesh coloured sugarpaste. First of all, create a thick flattish bowl shape and then wrap it around your ball and begin to shape it into an egg shape forming an obvious chin and forehead area. Don’t worry too much about cracks as they will begin to disappear toward the back of the head where you will cut off any excess sugarpaste. Rhu has some handy tips for creating realistic facial shapes using your hands and fingers, with only minimal assistance form tools. When it gets to the finer details such as lips and so on, you will be looking to use some of the usual suspects. Watch and find out.
Now Playing
21:44

9. Adding Detail to the Face

This is where it really gets fun and the whole design relies heavily on the face as this is where our eyes will be drawn to first, so do take your time with this one. Rhu works on the nose and eyes in this lesson and spends over 20 minutes on these two features alone. That should give you an idea of the amount of work going into this model. The eyelids play a massive role in the realism of the face and you should spend time making sure they are not only placed properly but are smoothed into the face so that they are flush. They allow the eyes to have a more natural almond shape as opposed to a perfect circle which is what we want to avoid. Make sure you are sitting down and stay comfortable as this can get tiring on your shoulders and back. You may have noticed that we are preparing for two eyes when in actual fact one is being covered by an eye patch. You can always go ahead and make it anyway as it makes for good practice trying to get two eyes similar to each other.
Now Playing
10:33

10. Painting and Dusting the Face

A steady hand will be required for this lesson as well as a small assortment of brushes – a soft brush for dusting and two 0 brushes, one of which has most of the bristles cut off to allow for very fine paint work. This will be necessary when it comes to the eyelids and lashes. The painting work will bring all your modelling work to life and add a whole new dimension.
Now Playing
14:26

11. Working On the Neck and Body

When working on the neck, make sure your hands are nice and warm for this one as you will be primarily using your fingers to shape the sugarpaste. Rhu points out that the human neck is the same width as the head but when making female models she tends to make the neck a little thinner, but you have complete creative license here to do whatever you feel looks most pleasing to the eye. When rolling sugarpaste out for the body, make sure it’s not too thin so that it reveals every crease underneath and similarly not too thick for it to take away from the shape of the body.
Now Playing
12:43

12. Making the Sword

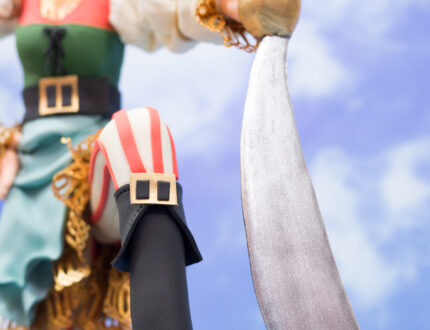
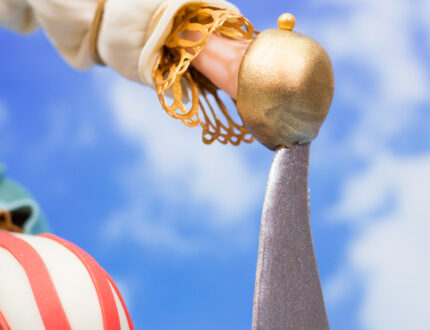
Don’t worry if drawing or design is not your strong point as Rhu has done all the hard work for you and there is a template available for download below. If, however, you fancy making a completely different sword then feel free to do so. Rhu gets her nice metallic grey colour by mixing a little black flower paste with white flower paste and when doing this, it’s always best to add in a little amount of black at a time and work it in and cut in half to make sure it has completely mixed in. When it comes to rolling out the sugarpaste, bear in mind that after a few hours it will dry quite solidly so don’t feel you have to roll it too thick.
You can download the templates here:
JPG – target=”_blank” rel=”noopener”>Princess Pirate Template 2
Now Playing
09:44

13. Adding Skirt Ruffles

If you haven’t made cake lace before simply scroll down to the Support Lesson below. There are lots of different Cake Lace mats out there and any of them would look great for this lesson. As long as you haven’t over-baked it, you will find that it’s actually quite strong stuff. You can bend it and ruffle it without it breaking and falling apart which is amazing considering how fine it looks. Rhu decides to add the skirt ruffle in sections for ease and this adds to the ruffled look. Again try and not use too much glue when applying it as it will slip down when you leave it to set or in an extreme situation may begin to dissolve the cake lace, but this is unlikely.
Now Playing
18:14

14. Making the Skirt

Now that we have the underskirt in place and looking lovely, it’s time to finish it off and add the material/sugarpaste. Again Rhu does this in sections and it just makes it all a lot easier than having to work with one large piece of sugarpaste. Try to avoid cutting the sections as rectangles, squares or anything too uniform and have fun putting folds and ruffles into them as you attach to the model.
Now Playing
10:06

15. Making the Arms

Remember as you are making the arms that they are eventually going to be covered so don’t worry about them having to appear seamless and perfect. When it comes to bending the arms, measure from the shoulder to the waist of the model and then you will know at what length to bend the arm to create the shoulder. Rhu measures 7cm and then 7cm again to the wrist but adds on another 3cm to allow for the right arm to be inserted into the waist as this model will have her hand on her hip. When rolling out the long sausages for the arms, go for about 1.5cm in diameter and don’t cut too deep when you are creating the channel to wrap around the frame.
Now Playing
11:08

16. Making the Hands

In this lesson, Rhu will show us how to make the hand that will be placed on the right hip. Rhu uses a great technique to create a realistic thumb shape using a separate piece of sugarpaste. This is a much easier way to do it especially for how the hand is going to be positioned. Simply create a slightly elongated tear shape and you have a thumb. It’s that simple. The only tools used for creating the hand are the scriber tool and dresden tool…brilliant!
Now Playing
10:33

17. Adding the Sword and Left Hand

Now that the sword has dried, we can add it onto the wire. So that it’s not showing at the back, Rhu cuts a strip of the same colour flower paste which she adds to the back of the sword and merges it in using her fingers and a dresden tool. For the left hand, we actually only have to make half a hand as it will be going into the cutlass of her sword. A small, light brown ball of sugarpaste cut into half and you have a cutlass. Easy does it. When cutting it in half, try and saw it slowly so you don’t warp its shape.
Now Playing
13:59

18. Making the First Sleeve

You will love how Rhu makes the sleeve. Not only does it look great but it is so simple to do! On first sight, you might think that she has shaped three large pieces of sugarpaste around the arm. This would be very easy to do, but it would be very difficult to get it to look like loose material. In fact, Rhu has wrapped three small sausages (sugarpaste) around the arm (one for each roll of sleeve) and then taken a relatively thin piece of marked sugarpaste and wrapped it over. The cake lace will come in handy again when making the cuffs.
Now Playing
12:29

19. Making the Second Sleeve

This lesson is basically a repeat of the last but some slightly different shapes and sizes are used to work with the shape of the arm.
Now Playing
20:59

20. Making the Bodice

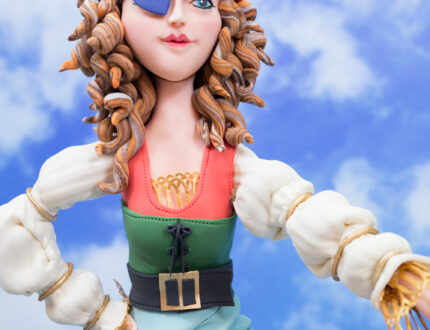
In this lesson, we will be starting on the bodice. Rhu has decided to go with a rich red colour of sugarpaste but you can chose whichever colour your prefer. Rhu breaks it down into two pieces of sugarpaste, one for a front panel and one for the back of the bodice. She uses a circle cutter to cut out the neckline on both panels. She puts on the back bodice panel first and then the front one and finally joining them at the shoulders. Instead of using a ruler to get the measurements, Rhu cleverly uses some kitchen towel which she can draw on to mark lengths. Once they are on, it’s just a case of cutting away the parts covering the arms, neatening it up and adding some stitching detail.
Now Playing
15:31

21. Adding Detail to the Bodice

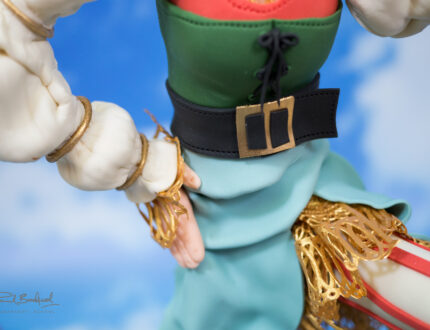
To start off, Rhu rolls out some green sugarpaste which she wraps around the torso to build up the bodice. Once it’s on, it’s simply a case of smoothing it on the body so that it takes the shape of model. Now we can start adding eyelets, some stitching detail and then finally some laces. The laces are made by rolling out thin strips of black sugarpaste and then carefully placing them from eyelet to eyelet with a brush and a little glue. The eyelets are made by using a wilton 5 nozzle to cut out tiny circles of sugarpaste which she then indents with a scriber tool.
Now Playing
11:54

22. Painting the Buckles and the Sword

In this lesson, Rhu makes buckles for the belt and the boots and uses Claire Bowman Gold Paint as well as Claire Bowman Silver Paint (both non-edible) for the sword. Once you have cut the buckles, remember to give them a little drying time before adding them so that they maintain their shape.
Now Playing
15:26

23. Finishing the Belt, Buckles and Braces for Arms

Now that the buckles have dried we can finish them off. As the boots are black the buckles don’t actually need to have holes cut into them as small rectangular pieces of black sugarpaste can be put on them to give the illusion of holes. This saves a lot of time and fidgety scalpel work. The exact same method is applied for the belt as it is also black. For the belt, Rhu simply rolls out a long piece of black sugarpaste and puts a little stitching detail on it and with the buckle added on it looks great. When it comes to making the braces for the arms, Rhu paints them once they are on the arms, however this can cause its own problems as it requires a very steady hand.
Now Playing
13:53

24. Making the Hair

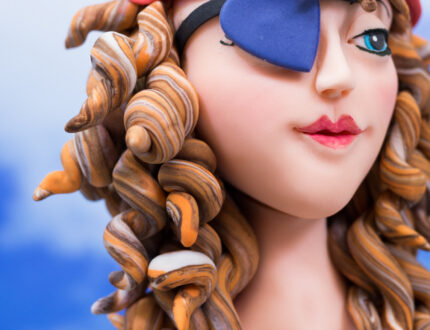
We’re getting there! Not long until we have finished this masterpiece… but what would a pirate princess be without her hair? Rhu gets a great bright hair colour by simply making three sausages of different colour sugarpaste and rolling then twisting them together. Once the colours are nicely merged it’s simply a case of then creating smaller, thinner sausages and twisting them to form ringlets of hair.
Now Playing
18:09

25. Finishing Touches

In this final lesson, Rhu carefully builds up the hair keeping in mind that a bandanna will be placed near the top of the head. The bandanna is simply made of a strip of red sugarpaste which is folded once and then wrapped around the head and pinched at the back. Once it’s on, it’s just a matter of putting hair on top of the head by rolling shorter curly pieces of sugarpaste. Just make sure you take your time here and step back every now and again as it is very easy to get carried away. Rhu does explain that adding the hair is very addictive so beware! The all-important eye patch will be added on too, which again is very straight forward and a cutter is used to make the heart shape and a thin piece of black sugarpaste is cut and glued to the head. All very simple and straightforward.

Now Playing
01:46

26. Other Ideas

In this lesson, Rhu shares some other ideas to get your imagination flowing and to help make this design unique to you. We would love to see your take on Princess Pirate Bonny Blue Heart.
Now Playing
26:10

27. Fast Forward

Struggling for time? Why not watch the entire tutorial in under 30 minutes!
Now Playing
08:22

28. Interview

Paul interviews Rhu Strand to find out more about her story and some exciting upcoming plans!

The wonderful Rhu Strand from Pimp My Cake introduces us to her fantastic Princess Pirate Bonny Blue Heart sugarpaste model. It has internal armature making it very sturdy and made to last, so it’s perfect as a show piece. As a winner of Best in Show for her fantastic Lola the Sugar Show Girl model at Cake International London 2015, you’ll be hard-pressed to find a better tutor than Rhu! Bonny Blue Heart incorporates many different techniques and is ideal for intermediate to advanced cake designers, however Rhu encourages anyone with sugarpaste experience to have a go. This will take around two days to make, allowing for drying time and is guaranteed to provide a great learning experience.

We would love to see your take on Princess Pirate Bonny Blue Heart – please share your photos with us on our Facebook Page!
Rhu Strand

Rhu Strand

With a proven track record in cake making, cake toppers and classes offering exceptional quality, Rhu has won gold awards for her figure work in international cake competitions and also for her business in Hampshire she also travels to teach both in the UK and Internationally as a guest teacher.
* indicates a required field
7 Day Free trial