Tutorial Preview
Bite Sized
Here’s a quick summary of the design in just over a minute!
Highlights
This a big tutorial, but you can watch the key learning in under 18 minutes on this highlights video!
1. Adding the wafer paper frills
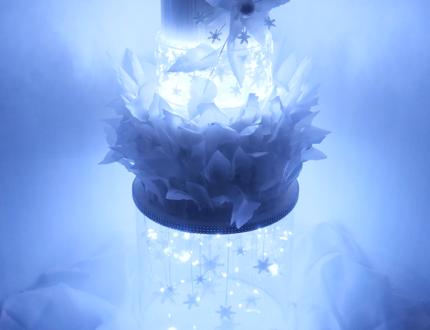
Paul gets started by talking through the design. He then creates the wafer paper frills and adds them to the cake to create the Elizabethan ruff effect.
NOTE: Paul starts with deep pre-covered cakes. If you need any guidance on how to get to this stage then check out the lesson on Covering a Double Barrelled Wedding Cake.
2. Creating and adding the wafer paper spikes
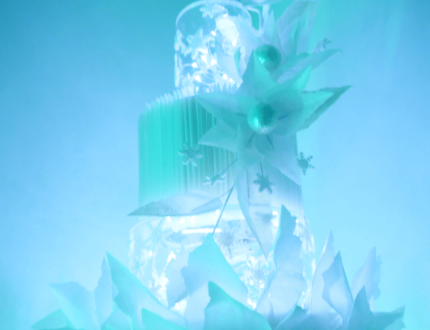
Paul now creates and decorates the bottom tier with shaped wafer paper spikes.
NOTE: Apologies for the sound echo which was due to an error on one of the cameras. It was sorted for your next lesson.
3. Making the snowflakes
Its now time to start making the snow flake decorations. Paul ultimately ends up with 48 snowflakes, but you might want some spares just in case of breakages.
4. Dusting the snowflakes
Paul brings the snowflakes to live with a gentle sparkle dusting, which has a great effect.
5. Attaching the snowflakes to the board
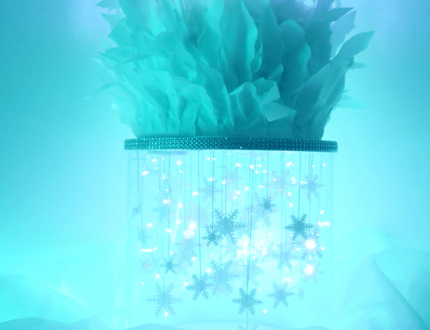
How do the snowflakes hang in mid-air? You’ll find out in this lesson.
6. Adding the lights
Now for the tricky part as Paul adds the fairy lights to the display board, which will all ultimately hang upside down within the Prop Options acrylic stand.
7. Stacking the cake
Before moving on to add the wafer paper flowers, Paul stops to check to see that the cake stacks and displays with the lights all switched on. This is a great early insight about what’s to come.
8. Part 2 - Adding the snowflakes and lights
It is now time to create the snowflakes and lights, which really brings the acrylic separators to life.
9. Part 2 - Adding details to the base tier
Paul now starts to fill out and finish the base tier decorations.
10. Part 2 - Making the flowers
One of the key features of this design is the lovely wafer paper floral display. Paul now creates the leaves and starts to bring the flowers together.
11. Part 2 - Dusting the leaves
Now time to add shading dust really brings the leaves to life creating a lovely sparkle.
12. Part 2 - Arranging the flowers on the cakes
Paul now carefully arranges the floral display to maximise the impact of this beautiful design.
13. Part 2 - Final setting up of the cake
Are you ready for the big finale! Paul now brings all the tiers and components of the cake together to great effect.
14. Other Ideas
Paul shares some alternative ways to maximise the impact from the skills learned with this design.
15. Pro Lesson
This is for our cake business owners to learn about pricing and how to optimise profit with this design.
Snow White Snowflake cake tutorial
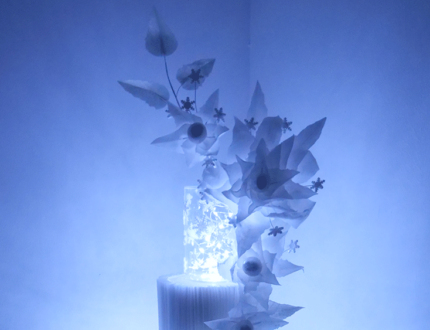
Create this stunning design using basic cake skills, but a tsunami of imagination aided by some Prop Options acrylic cake separators. This is certainly a design where the photos just do not do the cake justice. Scroll down to the Gallery tab to some of the amazing effects that you will get from this design.
The Prop Options acrylic cake separators can be used for so many different designs, but tall wedding cakes separated with separators filled with fairy lights has a magical effect. If you want to WOW factor from a wedding cake then this is for you!
In the following tutorial, you will learn how to…
- Create an amazing modern wafer paper cake coverings
- Use Round Acrylic Fillable Clear Tier to create the wow factor with lights and glitter
- Make easy wafer paper flowers by ripping the paper, no cutters used
- Construct such a lovely flower display and how to attach to the cake
- and much, much more
Creating the Snow White Snowflake Wedding
A magical snowflake wedding is a winter wonderland-themed celebration that embraces the beauty and enchantment of the season. Picture a landscape adorned with glistening snow, crystal-clear ice sculptures, and delicate snowflake decorations.
Ceremony:
- Venue: A secluded winter forest or a snowy mountaintop
- Decor: Snowflake-shaped arches, ice lanterns, and twinkling fairy lights
- Music: A live cellist or harpist playing enchanting melodies
Attire:
- Bride: A white gown with snowflake embroidery and a matching snowflake tiara
- Groom: A navy blue suit with a snowflake-patterned tie
Reception:
- Venue: A cozy lodge or ballroom with floor-to-ceiling windows
- Decor: Snow-covered trees, snowflake chandeliers, and ice sculptures
- Menu: A festive feast featuring winter-inspired dishes and desserts
Entertainment:
- Live music from a jazz band or a string quartet
- Ice skating rink for guests to enjoy
Activities:
- Snowflake-making station for guests
- Hot chocolate bar with marshmallows and whipped cream
- Sparkler send-off as the newlyweds depart
Don’t forget to share your interpretations of this wonderful cake with Paul and the rest of the CakeFlix community on our Facebook group.
View hundreds of more world-class tutorials only at www.cakeflix.com.


