Tutorial Preview
Steampunk Stiletto Shoe
with Paul Bradford
Skill level:
Intermediate
HD Lessons:
18
11:33
1. Sole and the Heel
Use the supplied template to help you create the sole of the shoe out of flower paste, once the sole is cut out leave the sole to dry solid. The square cake (or dummy cake in this case) is iced with white sugarpaste and is finished off with a Steve Benson textured mat.
03:49
2. Airbrushing
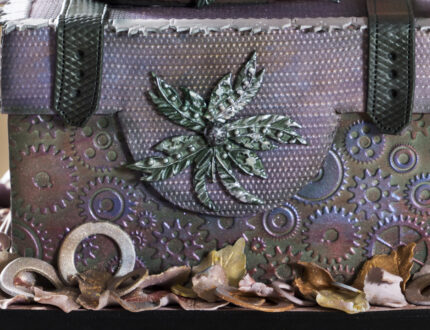
To pick out the cog details from the newly textured sugarpaste on the cake use an airbrush with a dark colour and lightly paint the sides.
05:52
3. Metallic Effects
Use a relatively firm sponge and metallic firecracker coloured Rainbow Dust branded dust to apply the bronze colour to the cogs. This leaves the background sprayed section untouched and really makes the texture design pop out visually.
04:01
4. Icing
The lid for the shoebox is now crafted in white sugarpaste and textured using a finely detailed mat. A mixture of dusts is sprinkled onto the sugarpaste and blended to l industrial colour.
12:22
5. Icing (Continued)
The textured sections made previously can now be attached to the cake and trimmed to size.
07:53
6. Flower Decoration
We cover the board using a textured piece of sugarpaste rolled out to size. Leaves are created and textured to add an extra layer of decoration to the board.
05:52
7. Board
Metallic dust colours are added to the leaves and also to washer shapes that have been created, these add to the industrial look of the cake. These pieces can then be positioned as shown onto the cake board.
03:14
8. Finishing the Top Tier
A decorative trim is created using an FMM trim cutter (or one of your choice) onto sugarpaste and attached around the top of the box. The trim has a silver satin dust applied.
05:14
9. Finishing the Top Tier (Continued)
The top tier work is continued with some black detailed straps to finish things off.
05:55
10. The Shoe
A heel and wedged sole is created for the shoe using simple techniques and some careful cutting. Leave to dry for 10 – 15 mins.
For an alternative shoe see the sandal tutorial linked here…
http://www.cakeflix.com/online-cake-decorating-courses/sandal-high-heel-shoe
10:13
11. Decorating the Shoe
The extra pieces of the shoe are now created using easy to follow techniques from Paul.
03:20
12. Airbrushing the Shoe
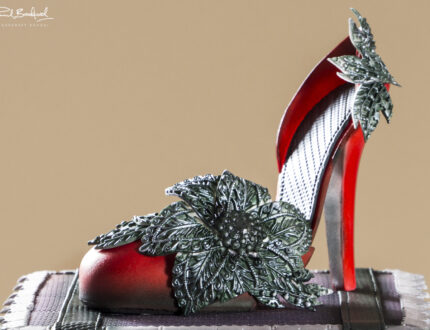
Wicked Scarlet colour edible paint from the Sugar Mill is used for the airbrushing of the shoe. Try and spray in even layers to achieve a great finish, a turntable helps too!
04:41
13. Airbrushing the Shoe (Continued)
The inside of the shoe is sprayed black and subtle black shading is added to areas of the shoe as shown.
04:08
14. Shoe Decoration
We’re creating a flower to use with the Stiletto shoe, Paul uses a CEL Cakes mould to create the parts of the flower and also uses Steven Benson cutters for extra shapes.
16:20
15. Airbrushing the Shoe Decoration
The decorations made in the previous lesson can now be lightly sprayed black and then brushed over with silver highlights. This gives a fantastic metallic look to the flower pieces which can then be attached to the shoe and the box.
02:40
16. Finishing Touches
A stylish insole for the shoe is created along with some final details using the clear edible spray glaze.
01:54
17. Other Ideas
Paul shares some other ideas for this cake and ways to change the design to suit a specific customer or occasion.
02:04
18. Pro Lesson
For the Pro lesson Paul shares tips for merchandising this cake and also goes into in depth costs and what to charge if you’re selling this cake or thinking about selling this cake in your business.
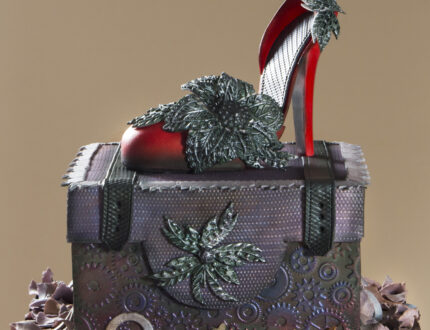
Introducing the Steampunk Stiletto Shoe Cake, a beginner / intermediate cake that’s ideal for anyone that’s a fan of the steampunk style (and of course shoes!)
Paul Bradford teaches you every step of the way and this course will have you creating a sugarpaste stiletto shoe, metal effect brooches and shoe box with a different design than you’re used to seeing.


