Tutorial Preview
1. Stacking the Cakes
2. Making the Cone
3. Colouring the Chocolate
4. Attaching the Hearts
5. Starting the Wrap
6. Finishing the Wrap
7. Icing the Board
8. Building the Bear
9. Building the Bear (Continued)
10. Making the Head
11. Making the Head (Continued)
12. Adding the Features
13. Piping the Bear
14. Piping the Bear (Continued)
15. Airbrushing the Bear
16. Facial Features
17. Finishing Touches
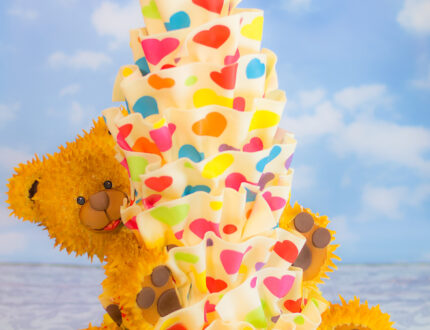
Over Christmas, Paul was delighted to work with some amazing cake decorators who came together to create a cake calendar to raise money for the very special charity Icing Smiles. This week, we bring you the cake that was featured on the front page of the calendar, the Teddy Bear Wrap Cake. Keeping true to the spirit of Icing Smiles, Paul wanted to create a cake that would bring enjoyment to children in difficult times. This cake is packed full of color, fun and surprises and would be perfect for any you child’s birthday party.
The cake features a teddy bear constructed with rice crispy treats and a chocolate wrap – two of Paul’s favorite things in one cake! During this course, you’re going to learn Paul’s famous chocolate wrapping techniques, how to create colorful heart patterns in modeling chocolate, how to use your airbrush to add life to your teddy and much, much more!
If you have a spare moment, please take a look at the amazing work that Icing Smiles do and donate HERE to this great cause.


