Tutorial Preview
Vintage Piping Techniques
with Ceri Griffiths
Skill level:
Intermediate
HD Lessons:
25
02:59
1. Introduction
Struggling for time? Why not watch the whole tutorial in under 13 mins by clicking Fast Forward below the Lessons.
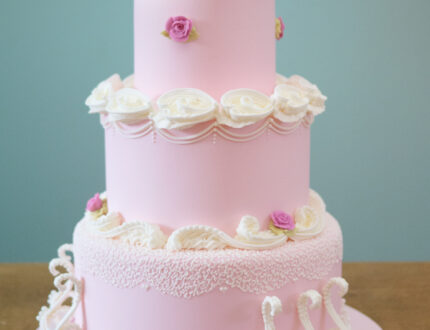
Ceri starts off by sharing his vast knowledge about contemporary royal icing and it’s application to various cakes. There are a lot of things to consider when piping a cake and Ceri keeps us right. He then goes on to give some ideas for the cake he will be working on as well as other options, in case you would like to pipe onto something a little different.
11:00
2. Cake Mapping
In this lesson, Ceri gives us the low-down on cake mapping, a very important part to piping a cake that will make sure your work is accurate and uniform. This vital part of the whole process can all be done with some baking paper, a ruler, a pencil and some nice scissors. Simple!
06:03
3. Decorating the Cake pt 1
Now that the mapping is complete, we can move onto piping. Before we start piping onto the cake however Ceri demonstrates some techniques that we will be using. This way we can practice beforehand and ensure we don’t ruin the final cake. Ceri shows us shell borders, barrel, beading, rope icing and the different ways in which they’ll be used.
04:25
4. Decorating the Cake pt 2
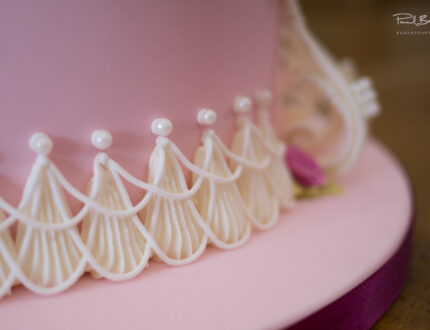
Now it’s onto the cake! Ceri takes those techniques he showed us in the previous lesson and transfers them onto the cake. Ceri is using a PME number 3 nozzle with soft peak icing for this lesson. He starts by adding a running shell around the base of each tier. Ceri advises not to use a turntable as well as not icing more than 2 inches at a time to ensure accuracy. Remember to always keep that nozzle clean. A small, damp paintbrush will be your best friend for this whole tutorial and you will definitely want it at the ready for this lesson.
06:00
5. Decorating the Cake pt 3
In this lesson, Ceri is using a PME number 13 star nozzle and is going to add some more running shells but this time to the edge of the middle tier. There is a different technique used for these larger shells as you do one a time. Then it’s onto vertical shells which are added to the bottom edge of the cake and are done in sets of 7. This is where the cake really starts to look pretty.
02:18
6. Decorating the Cake pt 4
Ceri now adds 12 barrels to the bottom edge of the middle tier. You want the barrels to be as uniform as possible and each one should have the same amount of loops, overall thickness and tapered ends. It’s a lot to think about and do in one fluid movement. By now, you will start to appreciate the importance of forward planning with this style of royal icing and that it’s definitely not something that should be improvised.
03:34
7. Scratch work & Cornelli Lace
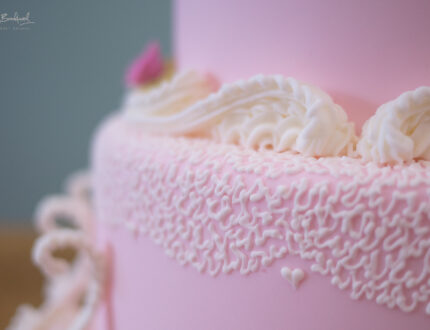
In this lesson, Ceri teaches us the difference between ‘scratch work’ and ‘cornelli lace’ and the appropriate application of each. Scratch work is a lot quicker and easier and doesn’t really require any planning, but just a loose hand and some spontaneity – just make sure you’re not piping from right to left (if you are right-handed) or left to right (if you are left-handed) to prevent you from stabbing into the cake and creating incomplete lines. Cornelli lace gives the illusion of being one continuous line and so requires a bit more thought with regard to the overall design and where it begins and ends.
01:47
8. Applying the Scratch work
This is a very therapeutic process and the finished product is very effective. It can however be quite a time-consuming technique, so may wish to plan ahead if you want to cover a very large area with it.. Remember not to pipe over the paper template as it will stick to the cake or damage your scratch work when removed.
03:12
9. Finishing the Scratch work
To finish off this section, Ceri adds some piped love hearts underneath each arch of the scratch work. He does this by piping small mirrored shells next to each other – very clever!
05:42
10. Piping Scrolls
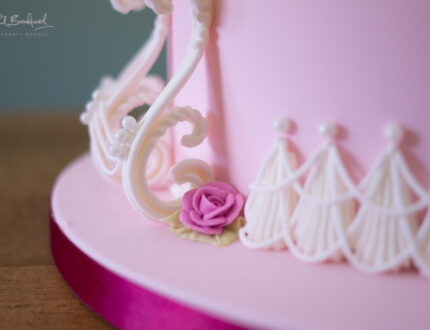
In this lesson, we will be learning ‘English over piping’. According to Ceri, 99% of piped borders are most likely made of of two different shapes used in various way, the two shapes being an ‘S’ shape and a ‘C’ shape. That doesn’t sound so hard, now does it? Let’s see it in practise. Ceri shows us how to make a lovely looking scroll and breaks it down for us.
04:27
11. Applying the Piping pt 1
Now we will be piping onto the 4” top tier using a PME number 4 Nozzle. Ceri will be piping 12 double C’s onto the edge. Ceri makes it look very easy indeed and with his clear instructions, you too will be there in no time at all.
02:10
12. Applying the Piping pt 2
Now we will be working on the side of the cake again and we will be piping a rope underneath the edge of the top tier, attaching along the bottom of the double C’s Ceri just piped. You can see the whole design really coming together now.
05:30
13. Applying the Piping pt 3
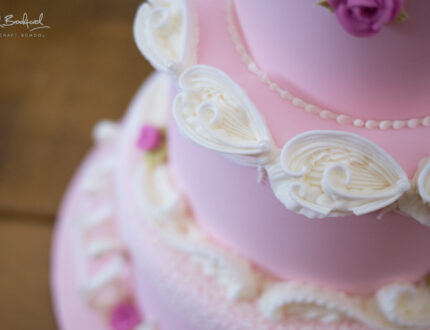
In this lesson, Ceri shows us some more over piping and will be applying C scrolls on top of the large shells. You need to be careful to watch how much pressure you apply while doing this as the shells may have become brittle on the outside, but will be soft on the inside depending on how long you have left them. Just be careful with how much pressure you apply while piping on top of existing piped work. Next Ceri adds some C and S shapes over the barrels. This will be mirrored work and requires some concentration. We would definitely suggest practising this a few times before applying directly on to the cake.
05:54
14. Applying the Piping pt 4
Ceri now shows us how to pipe a blade/frill and he applies this technique onto each of the large shells, mirroring the recently added C shapes. Not only that, but he also adds some double C’s similar to the one’s he added to the top of the cake. Always remember to allow drying time between each addition of royal icing when going over piping.
10:13
15. Piped Off Pieces
Now we are moving onto something new – piped off pieces. This is exactly what it sounds like – piped work that is actually done off the cake and then added to the cake once it has dried. The piped pieces look quite tricky to do, but once it’s explained in easy stepy by Ceri, you’ll find it very straight-forward to follow. In this lesson, all of the techniques demonstrated previously come together to show what beautiful creations can be made. Ceri will show us how and where to attach them to the cake in a later lesson.
09:55
16. Cocktail Stick Roses
Did you know that there are piping tips/nozzles for left and right-handed use? Ceri explains the differences in this lesson and uses uses a firm peak royal icing (he mentions that he may actually have had it a little firmer). Always remember to cover up your royal icing when it’s not in use, even if it’s just for a few minutes. This lesson will teach you some simple piping work that can be used on any style of cake, cupcake or biscuit. A very simple and cute bit of piping work.
09:54
17. Stacked Line Work
Now, back to the cake. Ceri builds up the design at the top of the cake with stacked pipe work. It’s exactly as it sounds. You will be adding more and more layers and different shapes on top of the existing piped work to form intricate and detailed patterns. Ceri uses the same shapes and techniques as earlier but just changes the sizes and thickness.
06:56
18. Stacked Line Work pt 2
Ceri continues with some more stacked line work and next it’s onto something we haven’t yet done – ‘draped line work’. This requires a deep trust in your royal icing as well as gravity. Make sure the marks you place on the cake before doing this are definitely accurate as this could ruin the look of the whole cake as you will be adding thinner drapes underneath the initial piping which will follow the same pattern.
03:24
19. Draped Lines
In this lesson we will be using the draped lines technique, but this time we will be adding them to the bottom of the cake to attach the vertical shells. This gives a beautiful rope effect which looks very pretty. And that’s not all. Later on we will be adding some bling on top of these to really add that “wow” factor.
08:13
20. Off Pieces
Now it’s time to attach those lovely off pieces. We advise that you have spare off pieces just in case you do damage one while attaching them as this can be quite easy to do. Next, it’s adding some more draped lines but this time they are hanging between each off piece so they are not attached to the cake in anyway and this looks very effective.
03:45
21. Leaves & Crocodiles
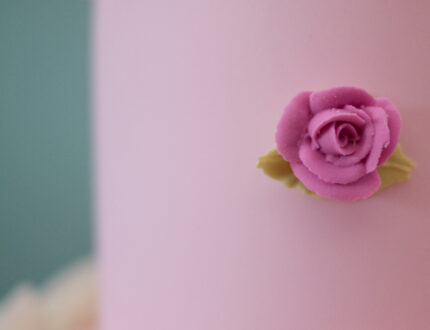
The theory behind the leaf and crocodile is this – when you are using your leaf piping nozzle think of it as a crocodile and rest it’s chin on the surface you are piping – you will get a perfectly piped leaf. Soft peak royal icing is most appropriate when piping leafs as well. Now that you have your beautifully piped leafs, roses and dragées (not silver or gold as Ceri explains) let’s add them all to the cake.
09:08
22. Applying the Roses & Dragees
We are nearly done! When it comes to the leaves, again we advise having a few practises before piping directly to the cake. Make sure you have tweezers to hand as well as a very steady hand as you’ll be adding quite a few. And we’re done! Now stand back and look at your beautiful creation and post a picture on our Facebook Page.
12:39
23. Fast Forward
Struggling for time? Why not watch the whole tutorial in under 13 mins!
01:38
24. Other Ideas
Ceri shares some other ideas to help you come up with your very own project/cake and make it unique and wonderful. Hopefully, it’s enough to get your imagination flowing and once again please feel free to share your designs with us on our Facebook Page.
03:17
25. Pro Lesson
How much does it cost to make? How much should I charge? How can I better organise myself to brings costs down? Ceri answers all of these questions plus shares a little extra advice.
Ceri Griffiths introduces us to this week’s tutorial which will be covering many different vintage piping techniques to make a beautiful vintage style wedding cake. Ceri advises giving yourself a day to make this (not including the cake) and be at an intermediate level with piping.
We would love to see examples of your piping work – please share your snaps with us on our Facebook Page!
