Bite Sized
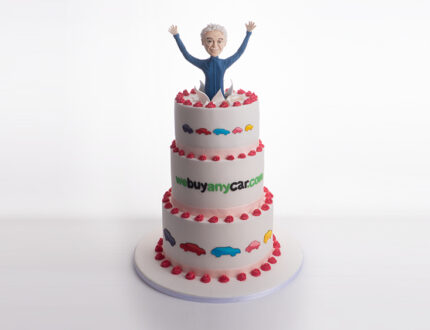
Watch Paul make this cake for WeBuyAnyCar.com in just 1 minute!
Highlights
Hand picked highlights from this tutorial!
1. ganaching
Paul begins by levelling the cake then applies the first coat of ganache.
2. white chocolate ganache
In this lesson Paul adds the second layer of ganache to the sides and top of the cake then gets rid of any blemishes and imperfections with hot water and a pallet knife in preparation for covering it with sugarpaste.
3. covering the cake
Paul now covers the cake using sugarpaste then smooths it off to give it a nice, clean finish.
4. making the head pt 1
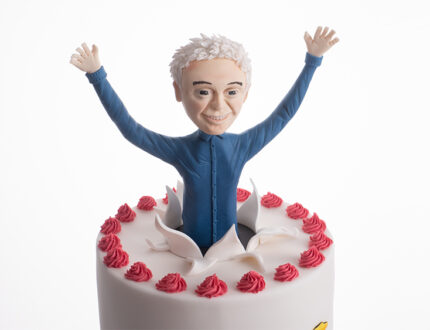
Now that the cake is ready we’re moving on to the sculpting of Phil’s head!
5. making the head pt 2
Time to get technical as Paul sculpts the more intricate facial features.
6. sculpting the face
Now that the facial structure had been made, Paul covers the face with modelling paste then uses his PME tools to bring out the facial features underneath.
7. eyes and teeth
So now that the head is finished we move on to the more intricate facial details starting with the eyes. Paul uses white sugarpaste for the eyes then paints the colour of the eyes on with a very fine paintbrush. After the eyes are complete he then uses more sugarpaste for the teeth then indents the shape with the PME tools.
8. ears and eyebrows
Paul uses a great technique for creating simple and effective ears for the model. He then bring out the paintbrush this time to paint on the eyebrows, take your time and slowly build on the eyebrows to get the best result.
9. making the hair
Paul shows you a quick and easy way of making hair without having to cut out individual strands. Scissors are then used to texture the hair even more.
10. making the body
In this lesson you will learn how to make a body using an internal wire which can be bent to create the perfect pose.
11. making the hands
All that is left to complete the model is the hands. In this lesson you will learn to make detailed hands for your model.
12. stacking the cakes
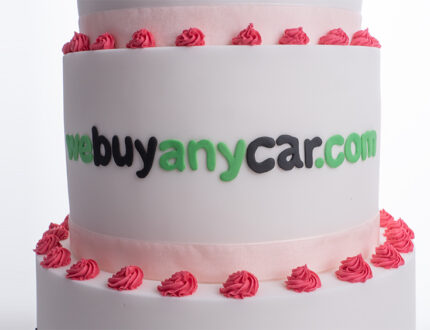
Paul shares his technique on how to stack cakes evenly on a board. Once the cakes are stacked he adds a ribbon to each tier.
For additional information on stacking deep cakes see Stacking a Double Barrelled Cake.
13. lettering and logo
In this lesson Paul will show you how to create letters and logos using tracing paper and a very steady hand!
14. making the cars
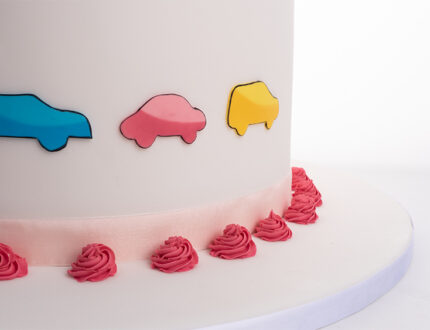
Paul uses the airbrush to get the two-toned effect of the cars from the webuyanycar.com logo then shows you how to neatly add them to the cake.
15. adding the model to the cake
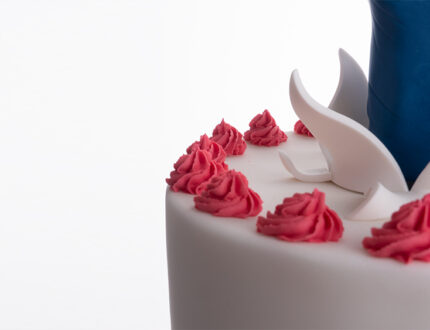
For this lesson Paul created the bursting effect for the top of the cake then adds the model.
16. finishing touches
All that needs done now is to add the red swirls to each tier and that’s our cake complete!
17. Other Ideas
Some other ideas for a cake like this.
18. Pro Lesson
Everything a pro need to know about making and selling cakes for corporate business.
webuyanycar.com Cake Tutorial
Learn how to make this amazing cake for webuyanycar.com featuring Phillip Schofield, made by the multi-award winning Paul Bradford
In the following tutorial, you will learn how to…
- Use royal icing
- Create armature models
- Sculpt realistic faces
- Create edible company logos
- and much, much more
Don’t forget to share your interpretations of this wonderful cake with Paul and the rest of the CakeFlix community on our Facebook group.
View hundreds of more world-class tutorials only at www.cakeflix.com.
webuyanycar.com tools and ingredients
Other US to metric and Metric to US
Cake or Dummy
- 12” x 7” round
- 10” x 6” round
- 8” x 5” round
Cake Drums
- 8” round
- 10” round
- 12” round
- 14” round
Ganache
- 4kg white chocolate
Modelling paste – Sarancino
- 60g flesh tone
- 200g Navy blue
- 50g grey
- 50g Pink
- 50g Blue
- 50g Red
- 50g Yellow
- 50g Purple
Sugarpaste
- 4kg white
Airbrush colours
- Pink
- Blue
- Red
- Yellow
- Purple
Petal dusts
- Brown
- White
- Black
- Green
- Poppy red
Paint
- Bravo quick paint (ethanol)
Ribbons
- 18mm x 4m Pale pink
- 18mm x 4m Pale pink satin
Other
- Cornflour puff
Knives
- Sharp cutting knife
- Craft knife
- Serrated knife
- Pallet knife
- Scissors
Modelling Tools
- PME set
Paint brushes
- Various sizes
Cakey Tools
- Rolling pins (large and small)
- Cake smoothers
- Acetate smoothers
Other
- Water spray
- Bamboo skewer
- 20 gauge wire
- Wire cutters
- Stacking paper
- Pencil
- 3 pins
- Glue stick
Comments
Add a Comment


Omg do you have the recipe for the cake
Click on the Ingredients tab (above) and you’ll get a printable version of what you need there.
I have checked the ingredients tab for this recipe of chocolate cake and the tab just doubles up with a list of tools and equipment – I cannot see a chocolate cake ingredients and recipe.
Sorry about the mix up, that’s the Ingredients added to the list…
https://www.cakeflix.com/wp-content/uploads/2019/08/Webuyanycar.pdf
If you are looking for the chocolate cake recipe it’s available here…
https://www.cakeflix.com/online-cake-decorating-courses/firm-and-moist-chocolate-recipe-a-free-course-by-paul-bradford
In the video paul says his chocolate cake is an oil based cake no butter used, have you got the recipe for it please? Only the chocolate cake recipe David has given a link to has got butter in it! Thank you in advance ?
When we had the cake shops we used an oil based pre-mix from Puratos. It was their Chocolate Satin Creme that we used, which was delicious, moist and lasted about 10 days (so long as it was kept in a cool dry environment). https://www.puratos.co.uk/en/products/satin_creme_cakemixchocolate
Thank you David
Thank you for the tutorial ☺️ I have a question: Do you not need to use dowels to support the upper tiers of cake.? Surely the weight of the cakes on top of the bottom tier would swish it.? ?X
You will need to stack the cake using dowels and cards. Here’s a lesson on stacking…. https://www.cakeflix.com/online-cake-decorating-courses/paul-covering-a-cake
*squish ?