Tutorial Preview
Highlights
Here we have carefully selected the key parts from the entire tutorial and condensed it into an 7 min long video. More than enough to get you started without taking too much time.
1. Making the armature
Paul talks a little bit about the design and then gets struck straight in by putting the armature together that will form the moose. Paul is using gardening wire, but you could also use 1mm thick armature wire. Then it’s time to cover it in modelling chocolate.
2. Adding the legs
Here Paul covers the legs with modelling chocolate which he advises will be a lot easier to use than sugarpaste. You can definitely see why when it comes to blending them with the body – plus you can make the legs as thin or as thick as you like. You’ll find that modelling chocolate does exactly what you want it to do with ease… as well as giving a nice shine when rubbed.
3. Adding the body
Here Paul builds the body with two larger bits of modelling chocolate moulded together over the wire using his hands and sugar shapers.
4. Adding the hooves
Now it’s on to the hooves. Paul is going for a young moose look – which means extra big and clumsy hooves. It’d be a good idea to get an image in front of you to use as a reference at this stage.
5. Adding the head, neck and muzzle
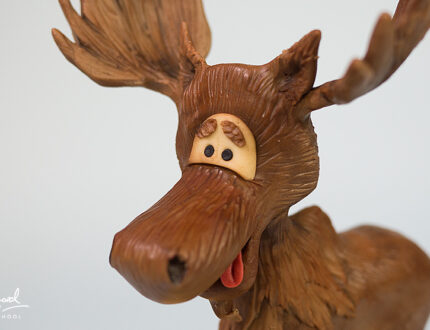
Paul now adds the head in two sections and then merges the two pieces around the wire rubbing it until the join is no longer visible. Paul gives it a rather flat and cute look to keep in line with the novelty feel, so don’t worry about aiming for realism too much. This will also allow plenty of room for nice big eyes.
6. Adding the antlers
Here Paul adds the antlers using thin pieces of rolled out modelling chocolate which he wraps and works around the wire in two sections per antler. It’s then a case of seamlessly merging the pieces together and cutting into it to create antler shapes using a sharp knife and modelling tools to create finer detail.
7. Adding the hump and mane
Paul now adds the famous (or not so famous) hump to the moose which is what separates it from the likes of an elk. He then moves onto adding the mane in two sections, and then textures it with modelling tools to give it a nice hair texture.
8. Adding the ears and eyes
Here Paul adds cute little ears to the top of the head along with cartoon style eyes using Paul’s signature style. Paul cuts out an oval shape of cream sugarpaste and then puts in two small holes for the eyes to go in, which he fills with tiny balls of sugarpaste.
9. Dusting the moose
Paul now finishes off the moose by going around it highlighting certain areas with various dusts to bring it to life. He adds a final touch by giving it a cute little red tongue.
10. Adding the flag
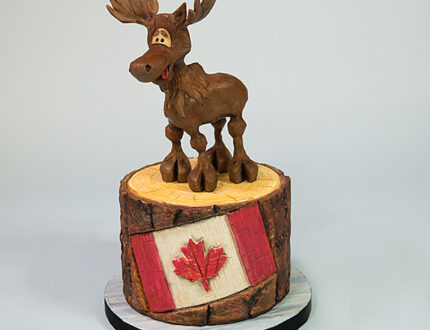
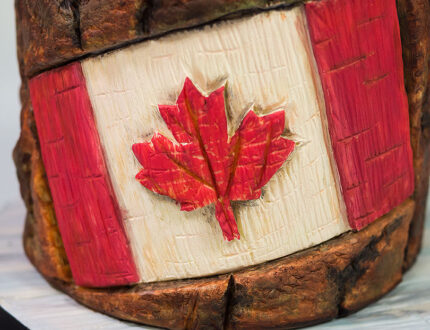
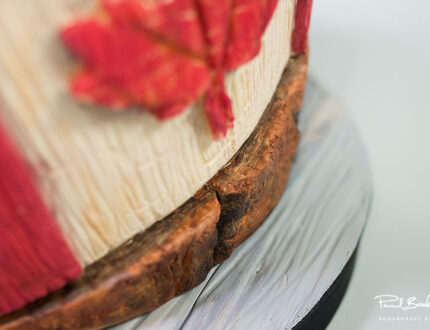
Paul has prepared a ganached six inch-round chocolate cake with some yummy dark chocolate ganache. He then cuts out a 5.5 inch long by 2 inch tall Canadian flag from white modelling chocolate and attaches it to the cake at an angle with some edible glue. Then it’s just a case of grabbing a modelling tool and marking it to give a nice realistic bark effect.
11. Adding the bark to the cake
Paul has gone ahead and added a disc of white chocolate to the top of the cake. Paul then cuts thick strips of white modelling chocolate and textures them with tin foil to create a bark effect and then adds them to the cake.
12. Finishing the bark
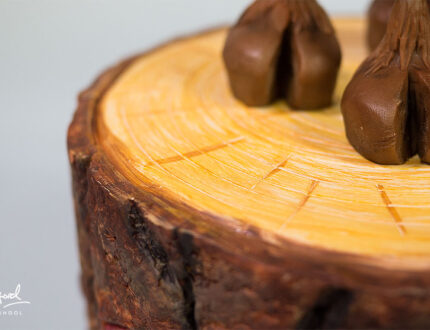
In this lesson Paul shows us how to place the pieces of bark around the flag to give the illusion that it has been carved into the cake. He then goes onto show us how to add the rings to the top of the cake which show how old a tree is.
13. Painting the flag
Paul now goes on to paint the flag using lovely reds and browns. The idea isn’t to get it perfect, but to look like it has been painted over bark. Paul first highlights little section with some brown dust and then goes over it all with red.
14. Painting the trunk
In this lesson Paul shows us how to get a lovely realistic bark effect using various dusts with a dabbing technique.
15. Finishing the trunk
Here Paul finishes the trunk off by highlighting the gaps with black and then the whole cake with with yellow and green which gives it a lovely realistic tone. He then goes on to paint the top again, highlighting areas with brown marks.
16. Finishing touches
Paul now creates a nice light grey wood effect board for the cake to sit on using blues and greys. He then uses straws for the moose to sit in to keep it all food safe… and we’re done!
17. Other ideas
Here Paul shares some other ideas you can try your hand at when making this cake. We’re sure you have some of your own great ideas and we’d love to see what you come up with.
Please share your pics with us on our Facebook page.
18. Pro lesson
In this lesson, Anna Maria shares some insider information about the cost to make this cake, as well as pricing, portions and other vital information for any professional cake designer.
We’d love to see your take on the Canadian Moose Cake – so share your snaps with us on our Facebook page!
