Tutorial Preview
Highlights
Here we have carefully selected the key parts from the entire tutorial and condensed it into an 10 min long video. More than enough to get you started without taking too much time.
1. The structure
In this lesson, Anna Maria explains how to make the structure and how to make it food safe, along with other measures such as protecting the dummy and the cake. You’ll be pleased to know the structure itself is very straightforward – a quick, simple design that offers brilliant results.
2. Preparing the cake
Anna Maria shows us how to prepare the cake. In this lesson you can pick up a great technique for getting a straight cut, without using any tools.
3. Ganaching the cake
Anna Maria shows us the first stages of getting the lovely sharp corners. If you get it right, covering it will be much easier.
4. Finishing the ganaching
In this lesson Anna Maria shows us how to finish off the ganaching of the cake – it’s incredible just how sharp she gets it. The lid technique will save you a serious amount of time when it comes to ganaching of the cake. She leaves it overnight to allow the ganache to set properly, which will make covering it a lot easier.
5. Covering the board
In this lesson, Anna Maria shows us how to cover the board and how to get a lovely bevelled edge all the way round.
6. Making the flowers and leaves
Anna Maria shows us how to prepare our flower leaves with the help of some templates that are available for you in the templates section below. She uses 18 gauge wire for the flowers. You might want to use a medium large ball tool as well as a pasta roller, but it’s not essential.
7. Making the filler flowers
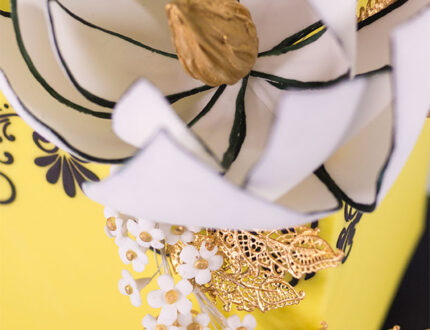
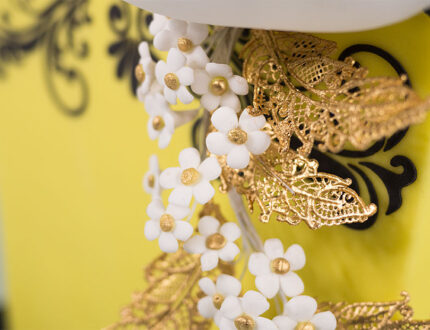
In this lesson, Anna Maria shows us how to make cute little filler flowers that are quick to make and look great in bunches.
8. Making the lace feathers
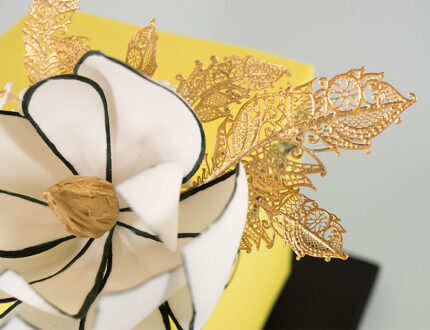
Anna Maria uses Gold Claire Bowman Cake Lace with a beautiful lace mat. Preheat your oven to 75 degrees and simply layer on the cake lace mixture, making sure you fill in every little detail and make sure it doesn’t run off the design. Put it in the oven for no longer than 10 minutes and then let them sit for a couple of minutes at room temperature. Another way to do it without an oven, is to let it sit for approximately 4 hours in room temperature or simply leave them overnight.
9. Finishing the flowers
Anna Maria shows us how to finish off the flowers with little ball of yellow sugarpaste and some beautiful paints. A small paintbrush and a steady hand are essential at this stage.
10. Covering the cake
In this lesson, Anna Maria shows us a fantastic technique for covering the cake in a way that gets beautifully sharp edges all around the cake. This technique makes so much sense and will save you a lot of heartache and time.
11. Adding a second lid to the cake
Anna Maria has decided that the lid of the cake is not quite as neat as she would like. As mentioned earlier you can fix this by adding a second lid which is shown in this lesson – and the results are brilliant.
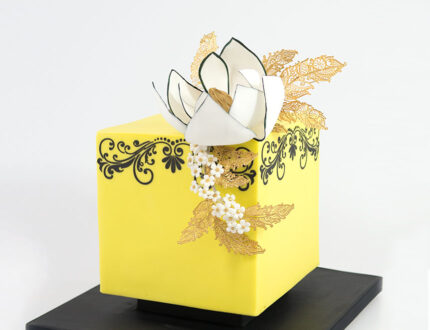
12. Assembling the magnolia flower
Next, Anna Maria show us hot to get rid of any unwanted stains on the lovely white leaves. She shows us how to assemble them securely to the centre using unflavoured dental floss.
13. Applying the stencil and placing the cake on the stand
Here Anna Maria shows us how to apply the stencil using black royal icing, which looks striking against the yellow sugarpaste. Remember when you scrape the royal icing across the stencil, to only go in one direction and not scrape left and right, as you can force the icing to go under the stencil and ruin the design. Now it’s just a case of adding the cake to the stand, which is nice and easy.
14. Lesson 14 - Finishing touches
In this lesson, Anna Maria shows us how to finish off the blossoms and leaves, and then goes onto to assemble them using white florist tape. To finish it all off she adds a nice black ribbon to go with the board.
15. Other ideas
Anna Maria shares some other ideas you can try out when making this cake. We’re sure you have some of your own great ideas and we’d love to see what you come up with.
Share your wonderful snaps with us on our Facebook page
16. Pro lesson
In this lesson, Anna Maria shares some insider information about the cost to make this cake, as well as pricing, portions and other vital information for any professional cake designer.
We’d love to see your take on the Floating Magnolia Cube – so make sure you share your snaps with us on our Facebook page.
Anna Maria Roche | Expert Tutor at CakeFlix
Since she was a child, Anna Maria has loved baking, drawing and creating weird and wonderful things with clay. Having parents who were restaurateurs in a small village in Austria, Anna Maria grew up to appreciate food and the work that went into it. Being in a family with five boys, she loved escaping to the kitchen cooking sweet treats for them, although there were many fights with cookies and cakes being taken before they were decorated!
At sixteen, Anna Maria started as an apprentice chef and later specialised as a Pastry Chef. After training she worked in some leading hotels in Austria and Switzerland.
Whilst working in Switzerland, Anna Maria came across her first piece of sugar art and was immediately hooked on this exciting and creative aspect of the industry. Her first and lasting inspiration was a wedding cake loaded with sugar flowers, making it love at first sight.
From that moment in 1987, Anna Maria knew she wanted to specialise in traditional wedding cakes and sugar art.
This made her cross the ocean and migrate to Australia
Anna Maria arrived down under with very little knowledge of the language, planning initially to work for a year and learn the art of cake decorating. However, she fell in love with the country and calls Australia her home.
She worked for some of Sydney’s top hotels and cake shops, including Sweet Art and Planet Cake, designing and creating cakes for people from all walks of life.
During her seven-year career at Planet Cake, she pioneered the teaching programmes for the successful school and was the creative force behind some of the most recognisable and original cake designs. Anna Maria was also the creative force behind three of the books published by Planet Cake and her work has been featured in many magazines.
She was also a popular personality in the award-winning Lifestyle Channel TV series, “Planet Cake”
Anna Maria has successfully taken part in many prestigious cake competitions and has won many awards; She likes to get out of her comfort zone to challenge herself, inspiring others in the process.
In October 2013, Anna Maria founded her own business; “Anna Maria Cake Design”. Besides designing and creating gorgeous cakes, she creates tutorials for companies to promote their cake decorating supplies and equipment. She conducts private lessons and small workshops in her studio in Sydney and teaches cake decorating in other schools across Australia and overseas.
Her diverse combination of qualifications, abilities and passion, together with her formidable creative skills has enabled her to inspire students around the world. She is very proud to see how their individual journeys have progressed. Many have gone on to have successful businesses of their own in Australia and overseas.


