Golf Bag Cake Tutorial | Enrol on CakeFlix for Learning Cake Decorating and Baking Tutorial

Tutorial Preview

Join NOW to access 1718 courses Watch Now
7 Day FREE Trial
Golf Bag Cake Tutorial | Enrol on CakeFlix for Learning
with Paul Bradford
Skill level: Advanced Cake Decorating | CakeFlix - Skill Level Courses
HD Lessons: 31
Decorating time: Two Days
Now Playing
03:34

1. Making the Stand Part 1

In this lesson, Paul looks at the materials and measurements used to create a stand for a rather large cake! You can adjust this to your own taste but remember that the cake sizes will also need to be changed to work with what you decide. He recommends that it’s best not to make the stand in your kitchen but perhaps in a shed, garage or even your back garden, weather permitting. Paul decides to go with a 3.5″ width and 20″ length for his stand.
Now Playing
04:14

2. Making the Stand Part 2

Now that the support piece has been cut, it’s time to add the support. Get your hot glue ready and watch your fingers! This lesson is fundamental as it looks further into the angles used as well as measurements that will work for a strong and realistic stand.
Now Playing
06:37

3. Completing the Stand

We’re getting closer to completing the stand! One more step to go. Now we have to drill it in order for dowels to fit in securely at the right angles. This is going to be one heavy cake.
Now Playing
01:50

4. Making the Stand Food Safe

We can’t have ganached cake directly in contact with the wood and have to ensure that it is food safe – Paul demonstrates how to do this.
Now Playing
07:23

5. Carving the Cake

All that hard work and preparation has paid off because now we’re onto the cake! In this lesson, Paul starts cutting the cakes to size and shape and begins to ganache and stack them. One thing to watch out for is the weight of the cake – watch the next lesson to see how to give it that extra support.
Now Playing
04:23

6. Supporting the Cake On the Stand

The weight of the cake definitely needs to be carefully considered and in this lesson Paul looks at how to avoid any horrible cracks or leaning towers. Paul also shows us how to use those tempting scraps as another layer…phew!
Now Playing
08:30

7. Lesson 7 - Ganaching the Cake Part 1

Now that the cake is neatly stacked and support is in place, it is time to glue it all together with the tastiest super glue on earth….ganache! You will need your carving knife to hand as some shaping will be necessary to get that round shape.
Now Playing
03:38

8. Ganaching the Cake Part 2

Now that the first layer of ganache has firmed up, it’s time to add the final layer to get rid of those bumps and lumps.
Now Playing
15:07

9. Applying Sugarpaste Part 1

One the ganache added to the cake, it’s definitely getting heavier so some extra support will be required. In this lesson, Paul makes sure the cake will stand strong and then moves onto adding the sugarpaste. This is where you have complete creative license! Which colours will you choose?
Now Playing
10:08

10. Applying the Sugarpaste Part 2

After all that hard work, we are now onto getting sugarpaste underneath the cake and around those dowels. Paul decides to go for black sugarpaste, but maybe you’d like to use another colour?
Now Playing
08:18

11. Applying Sugarpaste Part 3

Paul now covers the rest of the cake and begins to add some detail to the bag. Once this part is complete, you can really start to get creative. You might want to have a rest after all the rolling!
Now Playing
11:45

12. Making the Iron Heads Part 1

In this lesson, Paul starts on making the golf clubs. It’s all about the shape and texture so you may want to have a golf club to hand. If possible, it’s always useful to study the actual object as opposed to looking at a picture of one. However, if this is not possible, fear not as you are in safe hands!
Now Playing
07:17

13. Making the Iron Heads Part 2

Since the last lesson, Paul has decided on the best method for making a good iron head so stay tuned and all will be revealed.
Now Playing
04:43

14. Making the Driver Heads Part 1

Now that all of the iron heads have been made up and are ready to be sprayed, it’s onto the driver heads. This will require a lot of self control as a lot of rice crispy treats are used. Not only that….they will be covered in ganache!
Now Playing
06:09

15. Making the Driver Heads Part 2

Now we move onto carving the driver head and we are sure you will have a lot of fun here – we recommend having a cup of tea ready as there will be lots of little tasty spares!
Now Playing
05:20

16. Covering the Driver Heads

The next step is to cover those tasty drivers. In this lesson, Paul covers the drivers in black sugarpaste and works towards a smooth, rounded finish. Next, we recommend a good night’s sleep. You’ve earned it!
Now Playing
09:17

17. Making the Pockets

After a good night’s rest, Paul moves onto adding pockets to the golf bag. You can go free style, but Paul’s prepared some templates that could help:
Now Playing
10:36

18. Attaching the Pockets

It’s now time to attach the pockets to the cake. In this lesson, Paul uses some clever tricks to securely attach it without fear of it falling off as they are pretty heavy.
Now Playing
06:40

19. Lesson 19 - Covering the Pockets with Sugarpaste Part 1

Now that all the pockets are ganached and securely attached to the bag they need to be made pretty. Lets cover them with sugarpaste! Paul decides to use black sugarpaste. What will you go for?
Now Playing
11:57

20. Lesson 20 - Covering the Pockets with Sugarpaste Part 2

In this lesson, Paul continues to cover the pockets and begins to focus on adding more dimension to them by using other colours of sugarpaste.
Now Playing
23:20

21. Adding Detail to the Bag

The cake is really starting to take shape now but we’ve only just begun with the detail, there is much more fun to be had. Paul now moves on to the finer details of adding piping and stitching along with some other clever tricks to achieve a realistic finish.
Now Playing
13:40

22. Finer Details and Stitch Work Part 1

The cake is starting to look more and more impressive. In this lesson, Paul begins to add those little intricacies that really contribute to the overall look and feel of the design. He shows us how to make and attach a very realistic handle for the bag and use those PME tools to their fullest.
Now Playing
14:18

23. Finer Details and Stitch Work Part 2

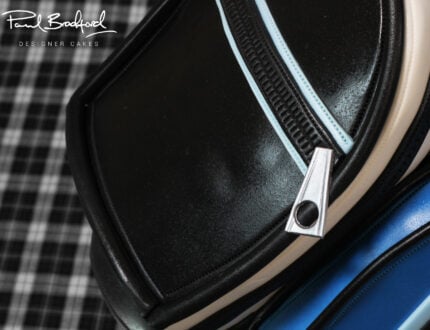
Paul continues to add more detail with further stitch work to create a zip  and by adding another colour of sugar paste. What a difference it makes!
Now Playing
09:42

24. Finer Details and Stitch Work Part 3

In this lesson, Paul finishes the piping work and adds studs to the bottom of the bag along with some other finer details.
Now Playing
12:35

25. Adding the Logo and Zip

Paul moves on to the logo for the bag as well as making the zips. This is where you can again have a lot of fun but be careful not to attach the logo until you are sure you like it as it can be very difficult to start over.

Now Playing
04:57

26. Finishing the Clubs, Zips and Towel

We’re almost there! In this Lesson, Paul does what it says on the tin. He creates a very realistic golf club towel which hangs from the side of the bag. You’ll then learn how to attach the zips in an effective way and how to make those clubs come to life. Another trick to help keep the towel attached is to use uncooked spaghetti and pierce it into the cake.
Now Playing
11:06

27. Adding Drivers to the Bag

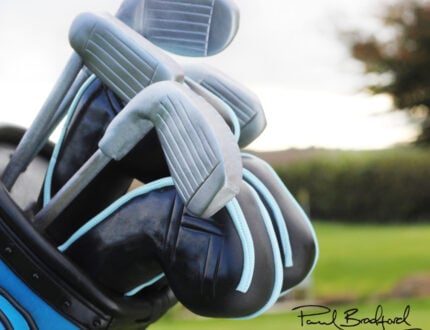
In this lesson, Paul attaches the drivers to the bag and gives some top tips on how to make sure they don’t fall off. As well as this, some finer details are added to the drivers to add a touch of realism.
Now Playing
07:32

28. Adding Irons and Grass to the Board

We are so close and looking at the cake really makes it all feel worth it! Paul now adds the irons on securely, attaches all the zips safely to the bag and pipes on the beautiful grass to really bring it all together.
Now Playing
01:42

29. Finishing Touches

Paul now adds the finishing touches with ribbon around the board (once the butter cream sets) and a quick glaze spray to add a leather shine effect to make the golf bag look very realistic. If you happen to own an airbrush then maybe you can add even more detail with this. We made it! Well done!
Now Playing
01:50

30. Other Ideas

You have free reign over the colours you choose and you can go the extra mile by adding figures, edible golf balls and so on. The possibilities are endless!
Now Playing
03:11

31. Pro Lesson

In this lesson Paul discusses the cost to and time to make the cake and tips about pricing and merchandising.

Join Paul as he makes a monster of a cake in this golf bag cake tutorial. This is a great cake to practice all of your skills and what an impressive cake it is. Ideal for any avid golfer and also brilliant for birthdays, retirements and special occasions, this cake take takes approximately two days to complete and is for advance level cake decorators.

Every golfer would appreciate the skill that goes into creating this golf bag cake tutorial.

A History of Golf: From Ancient Origins to Modern Times

Origins and Early Developments

Golf originated in Scotland in the early 15th century. The first known golf courses were simply stretches of coastal land where players used a wooden stick to hit a small, leather-covered ball into a hole. The game quickly gained popularity among the Scottish nobility, and by the 17th century, golf courses were being built all over the country.

The Spread of Golf to England and Other Countries

In the 18th century, golf began to spread to England and other countries. The first golf course in England was founded in 1744 in Blackheath, London. Golf also became popular in the United States, where the first golf course was built in 1888 in Yonkers, New York.

The Development of Modern Golf

The 19th century saw the development of modern golf. The first standardized rules of golf were established, and the game began to take on a more competitive nature. Professional golfers emerged, and the first major tournaments were held.

Golf in the 20th and 21st Centuries

Golf continued to grow in popularity in the 20th and 21st centuries. New technologies, such as steel shafts and graphite clubs, improved the performance of golfers. The game also became more accessible to people from all walks of life. Today, golf is played by millions of people around the world, and it is one of the most popular sports in the world.

The Future of Golf

The future of golf is bright. The game is constantly evolving, and new technologies are being developed to make it even more enjoyable. Golf is also becoming more popular in new countries, such as China and India. With its rich history and enduring appeal, golf is sure to continue to be a popular sport for many years to come.

We would love to see your take on the Golf Bag Cake – please share your photos with us on our Facebook Page!

Want to see more then check our full Cake Tutorial Library.
Paul Bradford

Paul Bradford

Paul Bradford´s mission is to ‘Empower people to achieve their cake decorating dreams’ by providing a range of cake decorating courses and online tutorials through their website, which currently teaches 195,000+ students.  
* indicates a required field
7 Day Free trial